Hello dear Amigurumi Followers
Today we share Amigurumi Geralt Crochet Free Pattern for you. As you know we share new free amigurumi pattern every day. The main crochets are gazelle, amigurumi bear, pola, crochet panda, penguin, giraffe, llama, pig, bunny, clown, lamb, bee, crochet unicorn, amigurumi doll, fox, penguin, dinosaur, crochet elephant, hippo, monkey, crochet cat, crochet dog and more …
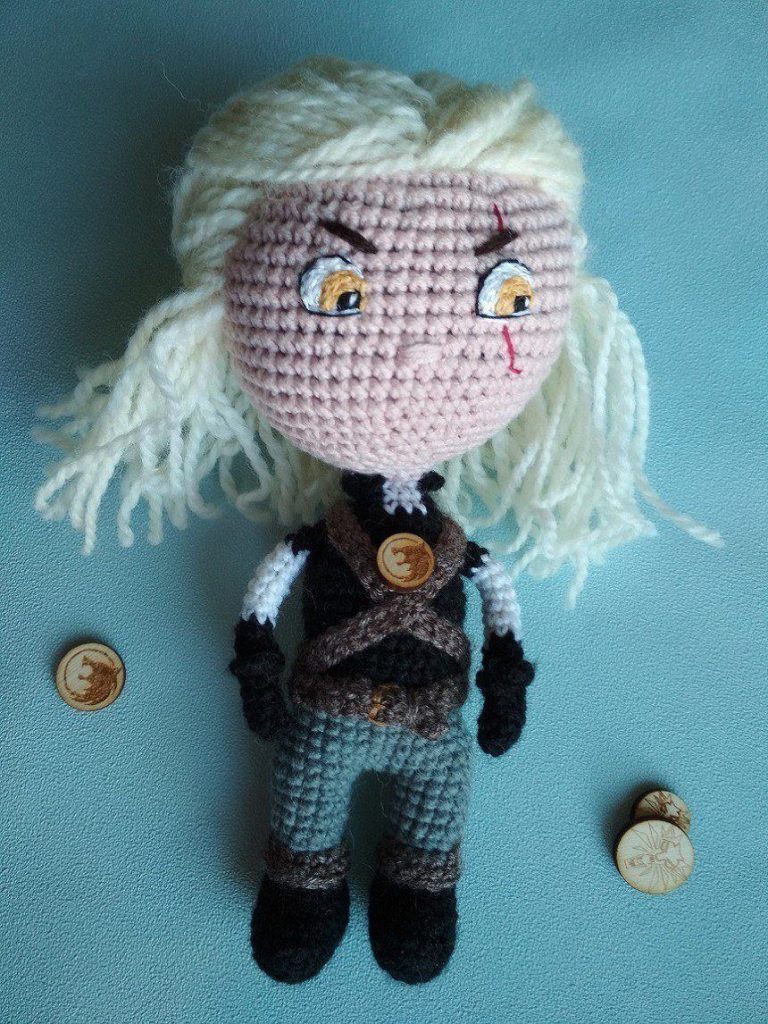
Todays daily new amigurumi free crochet pattern is Amigurumi Geralt Crochet.
I want to give you some informations about this amigurumi free pattern ; Geralt Crochet.
The height of the finished doll using the recommended materials is about 21 cm.

Materials:
– Alize Cotton Gold yarn. For the body: beige, for clothes: black, brown, gray, white
– For hair: half-woolen yarn of white or milky color
– For eyes: floss of white, black and yellow colors or you can use ready-made eyes
– Hook 2.5 mm
– Fine embroidery needle
– Scissors
– Needle with a large eye
– Filler
Legend:
RLS – single crochet
KA – amigurumi ring or also called a sliding loop
pr – increase (2 sbn in one loop)
ub – decrease (2 loops together)
PSN – half-column with crochet
PS – half- column
vp – air loop
(14) – number of loops in a row
Amigurumi Geralt Crochet Free Pattern
Handles (2 parts)
We start with black yarn:
1. 6 SBN in KA
2. 6 SBN
3. 5 SBN, 3 VP, in the 3rd loop from the PSN hook (knit a finger)
4-8. 6 RLS
Change to white thread:
9-14. 6 RLS
Change to black thread:
15-16. 6 СБН We
do not stuff our hands.
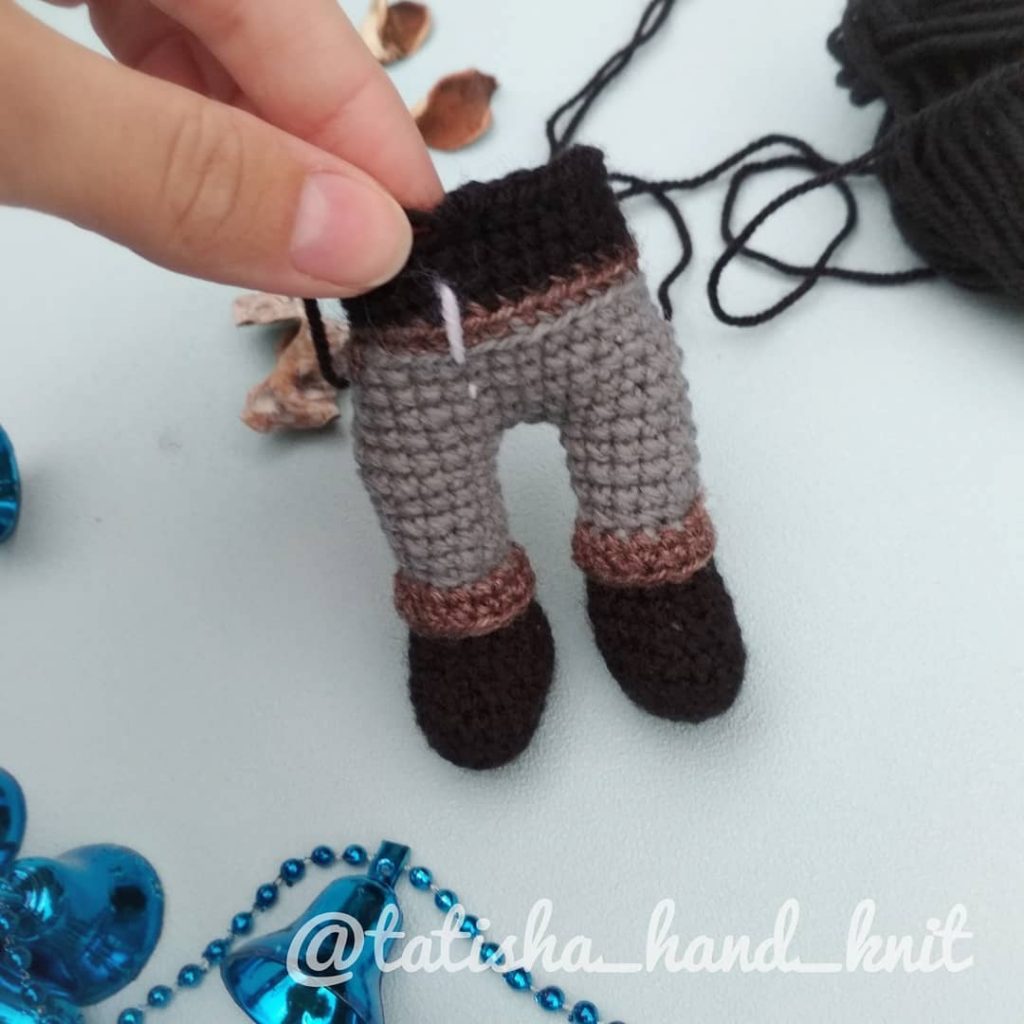
Legs (2 parts)
1.7 ch, in the 2nd loop from the hook: 2 sc, 4 sc, 3 sc in one loop, we knit along the second side of the chain: 4 sc, 1 sc in the first loop (an oval is obtained) (14 )
2. 2 pr, 4 sc, 3 pr, 4 sc, 1 pr (20)
3.20 sc for the back wall of the loop
4. 20 sc
5. ub, 6 sc, 2 ub 3 loops together, 6 sc (15 )
6. 6 PRS, 2 UB, 5 PRS (13)
7-8. 13 RLS
Change the thread to gray:
9. 13 RLS behind the back wall of the loop
10-14. 13 RLS
In the 9th row, where they knitted for the back wall of the loop, we make a lapel on the boots.
We knit 2 rows of 13 RLS by the front walls with brown yarn.
Cut the thread on the first leg, leave the thread on the second and connect the legs together with three VP.
We continue knitting on both legs and connecting three loops.

Body
15-16. 32 RLS 17.5
RLS, kill, 14 RLS, kill, 9 RLS (30)
18.5 RLS, kill, 13 RLS, kill, 8 RLS (28)
19-20. 28 RLS
Change the thread to black:
21-28. 28 RLS
29. We knit the handles, but not folding in half, but grabbing one loop on the handle and one on the body. In this row we knit the inner side of the handle, which is adjacent to the body.
5 RLS, 4 RLS, capturing the loops on the handle and on the body, 10 RLS, 4 RLS handle and body, 5 RLS (28)
If your handles are not level, knit offset loops, or do not knit several loops for alignment.
30. We knit the upper part of the handles and form the shoulders.
5 sc, 2 ub (we grab the loop on the handle and on the body together, but do not knit, then grab the loop on the handle and body together again and knit 2 loops together. Thus, we make 2 decreases above the handle to form a shoulder), 10 sc , 2 dec (for the handle and body), 5 sc (24)
31.2 sc, 3 dec, 6 sc, 3 dec, 1 sc, change to white yarn, do not cut the thread, 3 sc (18)
Decreases should be above handles. White is introduced for the visible white shirt.
32. Black yarn 2 RLS, 3 loops together (triple decrease), 6 RLS, 3 loops together, 1 RLS, change to white yarn 3 RLS (14)
33. We knit a collar.
Black yarn 11 СБН for the front half loops, 1 ch
34. Expand knitting and knit in the opposite direction 11 СБН.
Cut the thread. The torso is ready.
Head
1.6 sc in spacecraft
2. 6 pr (12)
3. (1 sc, pr) x 6 (18)
4. (2 sc, pr) x 6 (24)
5. (3 sc, pr) x 6 (30)
6. (4 sc, pr) x 6 (36)
7. (5 sc, pr) x 6 (42)
8. (6 sc, pr) x 6 (48)
9. (7 sc, pr) x 6 (54)
10-19. 54 sc
20. (7 sc, dec) x 6 (48)
21. (6 sc, dec) x 6 (42)
22. (5 sc, dec) x 6 (36)
23. (4 sc, dec) x 6 (30)
24. (3 sc, dec) x 6 (24)
25. (2 sc, dec) x 6 (18)
26. (2 sc, dec) x 4, 2 sc (12)
27.14 sc
We decorate the face, fix the hair.
We embroider eyes or use ready-made ones on a secure mount or half beads.
Sew on the head, stuffing the neck tightly along the way, you can insert a wooden stick or something else into the neck for rigidity.
