Hello dear Amigurumi Followers
Today we share Amigurumi Amelia Doll Free Pattern for you. As you know we share new free amigurumi pattern every day. The main crochets are gazelle, amigurumi bear, pola, crochet panda, penguin, giraffe, llama, pig, bunny, clown, lamb, bee, crochet unicorn, amigurumi doll, fox, penguin, dinosaur, crochet elephant, hippo, monkey, crochet cat, crochet dog and more …
Todays daily new amigurumi free crochet pattern is Amigurumi Amelia Doll.
I want to give you some informations about this amigurumi free pattern ; Amelia Doll.
You will need:
– Approx 100 g size 4 yarn
– Crochet Hook in Size 4.0 or 3.75
– Tapestry Needle
– Polyfil
– 10mm safety eyes
– Stitch marker
– Yarn for hair and clothes
Amigurumi Amelia Doll Free Pattern
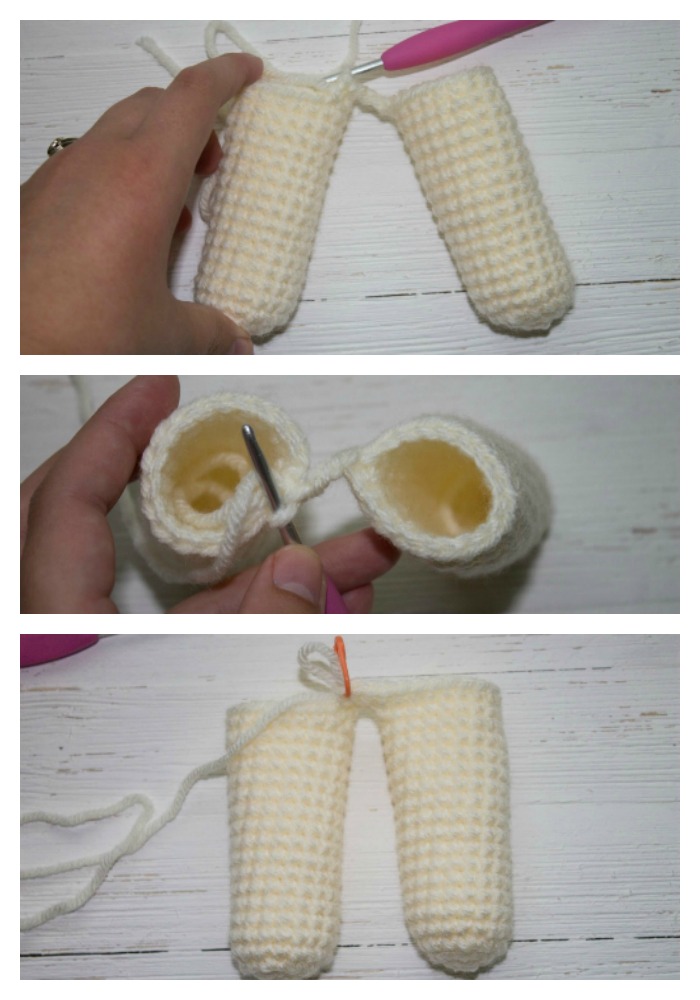
Legs (make 2)
Round 1: In a magic circle, SC 6
Round 2: SC INC in each stitch around (12)
Round 3: SC in first, SC INC in next. Repeat around. (18)
Round 4-18: SC in each stitch around. (18)
Fasten off.
Repeat for the second leg but do not fasten off. Instead, chain 3 and then SC in the next stitch of the other leg. Take care to crochet over the tail left over by fastening off. SC around the entire leg. When you come to the three chains, SC in each chain around the next leg. SC over the chain back to the other leg. In the last SC on the last chain place your stitch marker. (This is round 19.)
Round 20: SC around. (42)Rounds 21-34:: SC around (42)
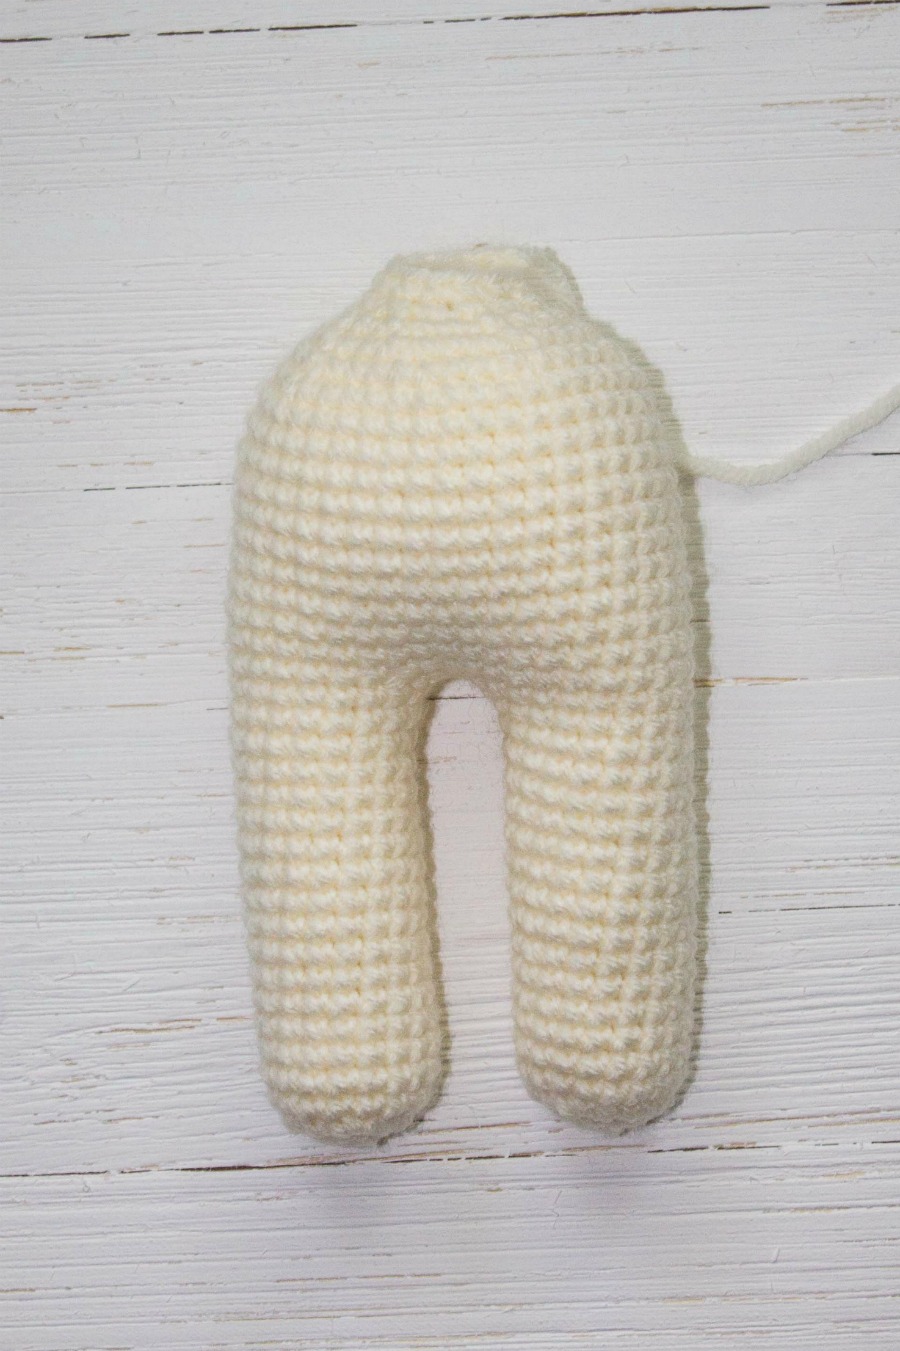
Round 35: 4 SC, INV DEC, repeat around. (35)
Round 36: 3 SC, INV DEC, repeat around. (28)
Round 37: 2 SC, INV DEC, repeat around.(21)
Round 38: 1 SC, INV DEC, repeat around. (14)
Round 39: SC in each stitch around. (14)
Round 40: SC in each stitch around. (14)
Round 41: SC in each stitch around. (14)
Fasten off and leave a long tail.
This is what you will use to sew on the head.

Head
For my best tips on how to attach the head, including a no-sew method, read this before you begin!
Round 1: In a magic circle, 6 SC.
Round 2: SC INC in each around. (12)
Round 3: SC in first, SC INC in next. Repeat around. (18)
Round 4: SC in first 2, SC INC in next. Repeat around. (24)
Round 5: SC in first 3, SC INC in next. Repeat around. (30)
Round 6: SC in first 4, SC INC in next. Repeat around. (36)
Round 7: SC in first 5, SC INC in next. Repeat around. (42)
Round 8: SC in first 6, SC INC in next. Repeat around. (48)
Round 9: SC in first 7, SC INC in next. Repeat around. (54)
Round 10-20: SC in each stitch around. (54)
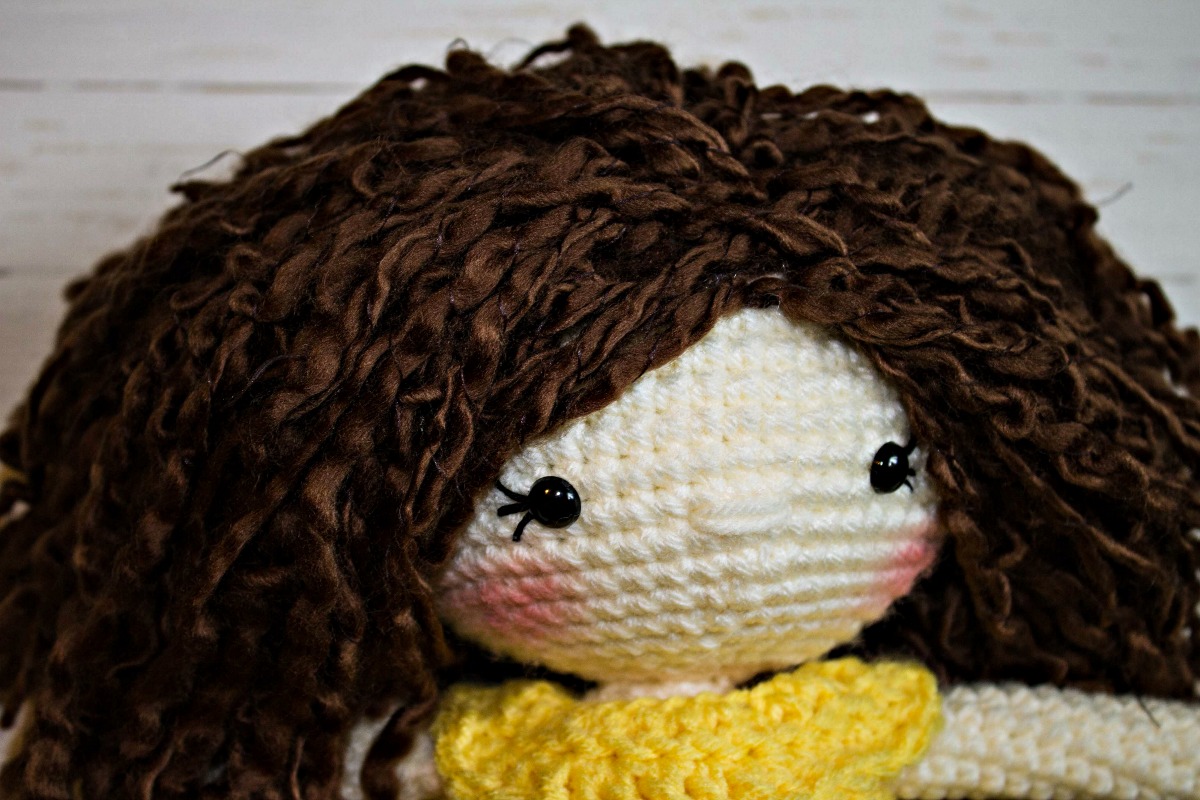
Place the safety eyes in between rows 15 and 16, eight stitches apart.
(Make sure you have read the Best Tips for Doll Faces before you begin!)
Round 21: SC in the first 7, INV DEC in the next. Repeat around. (48)
Round 22: SC in the first 6, INV DEC in the next. Repeat around. (42)
Round 23: SC in the first 5, INV DEC in the next. Repeat around. (36)
Round 24: SC in the first 4, INV DEC in the next. Repeat around. (30)
Round 25: SC in the first 3, INV DEC in the next. Repeat around. (24)
Round 26: SC in the first 2, INV DEC in the next. Repeat around. (18)
Round 27: SC in the first, INV DEC in the next. Repeat around. (12)
Round 28: INV DEC around. (6)
Fasten off and carefully sew the remaining hole closed. Leave a long tail to make the nose.
Arms
Round 1: In a magic circle, SC 10. (10)
Rounds 2-20: SC in each stitch around (10)
Stuff lightly and attach to body.
I sew them on between rows 36 and 37.

Strands of Hair
First I make a hair hat. Which is exactly what it sounds like. It
just basically cover the head so I don’t have to fill in every space,
but the skin color doesn’t show through.
This is a basic pattern. I use worsted weight yarn in a similar color to the bulky yarn if I am using bulky.
This hat is not worked in the round. You will attach with a slip stitch to
the first stitch after each row. Using a larger hook (I used a 4.5mm)
Row 1: DC 10 in a magic circle
Row 2: DC INC in each around.
Row 3: DC in the first, DC INC in the next. Repeat around.
Row 4: DC in the first 2, DC in the next. Repeat around.
Rows 5-8: DC in each around.
Fasten off and leave a long tail for sewing onto the head.

To make Amelia’s Dress:
The dress is made as a flat piece and then you will sew the edges together.
To make the dress, chain to a length that will just barely reach around the body. Due to the variations of yarn, amount of stuffing, and which hook you use, it is really difficult to give an exact number. But you want to have to tug just a LITTLE bit to make it reach.
(HINT: You could also do a foundation double crochet here.)
Row 1: Chain to desired length.
Row 2: DC in each chain across. Chain 1 and turn.
Row 3: SC in each chain across. Chain 2 and turn.
Repeat Rows 2 and 3 two more times (for a total of 7 rows, including the starting chain!)
Row 8: *DC INC, DC in the next two.* Repeat * * until the end of the row. Chain 1 and turn.
Row 9: SC in each stitch across. Chain 2 and turn.
Row 10: DC in each stitch across.
Fasten off and leave a long tail to sew the back together.
For the collar, chain to desired length. You want the ends to be able to touch the front and back of the dress. Then DC INC in the first stitch, DC in the next two. Repeat to the end. Sew on the collar in the front and the back.
More Amigurumi Doll Ideas:


