Hello dear Amigurumi Followers
Today we share Amigurumi Bunny Kylie Free Pattern for you. As you know we share new free amigurumi pattern every day. The main crochets are gazelle, amigurumi bear, pola, crochet panda, penguin, giraffe, llama, pig, bunny, clown, lamb, bee, crochet unicorn, amigurumi doll, fox, penguin, dinosaur, crochet elephant, hippo, monkey, crochet cat, crochet dog and more …
Todays daily new amigurumi free crochet pattern is Amigurumi Bunny Kylie.
I want to give you some informations about this amigurumi free pattern ; Bunny Kylie.

Abreviations
Mr- Magic Ring
Sc- Single Crochet
Hdc- Half double Crochet
Dec- Invisible Decrease
Inc- Increase
Slst- Slip stitch
BLO- Back loop only
Brackets []- repeat whats in the brackets
Materials
-Velvet/Chenille yarn weight 5 (I used Yarn Bee Velvety Smooth)
-5mm crochet hook
-Yarn needle for sewing
-Scissors
-Polyfill stuffing (fluff)
-15mm safety eyes
-Yarn for sewing eye details
-Stitch markers
Notes
Finished products may differ if a different type of yarn or hook is used. Safety eyes are a choking hazard for children under three, use with caution.
Amigurumi Bunny Kylie Free Pattern:
Head
1: sc 6 in mr (6)
2: inc 6 (12)
3: [sc 1, inc] x6 (18)
4: [sc 2, inc] x6 (24)
5: [sc 3, inc] x6 (30)
6: sc 2, inc, [sc 4, inc] x5, sc 2 (36)
7-9: sc 36 (36)
10: sc 2, dec [sc 4, dec] x5, sc 2 (30)
11: [sc 3, dec] x6 (24)
12: [sc 2, dec] x6 (18)
13: [sc 1, dec] x6 (12)
Fasten off yarn, leave long end for sewing, stuff with fluff.
Ears (x2)
1: sc 6 in mr (6)
2: sc 6 (6)
3: inc 6 (12)
4-7: sc 12 (total of 48 sc)
8: dec 6 (6)
9: Sc 6 (6)
Fasten off yarn, leave long end for sewing.
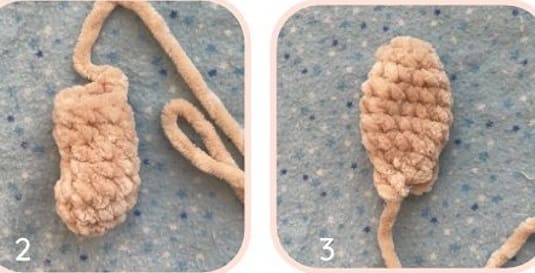
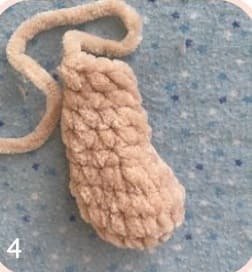
Arms (x2)
1: sc 6 in mr (6)
2: inc 6 (12)
3-4: sc 12 (12)
5: dec 3, sc 6 (9)
6-7: sc 9 (9)
8: [sc 1, dec] x3 (6)
9: sc 6 (6)
Fasten off yarn, leave long end for sewing. Stuff lightly with fluff.
Add stitch markers to the following points in the head for later face shaping:
Between rounds 8 and 9, place stitch markers 6 sc apart (6 sc in between each marker)
Between rounds 12 and 13, 2 sc apart (2 sc in between each marker).
Center the lower stitch markers with the stitch markers above.
Body
Using contrast Color
1: sc 6 in mr (6)
2: inc 6 (12)
3: [sc 1, inc] x6 (18)
4: [sc 2, inc] x6 (24)
5: [sc 3, inc] x6 (30)
6-8: sc 30 (30)
9: BLO sc 30 (30)
*In last sc of round 9, change color to main color*
10: [sc 3, dec] x6 (24)
11-12: sc 24 (24)
13: [sc 2, dec] x6 (18)
14-15: sc 18 (18)
16: [sc 1, dec] x6 (12)
17: sc 12 (12)
Fasten off yarn, leave long end for sewing, stuff with fluff
Legs (x2)
1: sc 6 in mr (6)
2: inc 6 (12)
3: [sc 1, inc] x6 (18)
4-5: sc 18 (18)
6: dec 6, sc 6 (12)
7: dec 3, sc 6 (9)
8-10: sc 9 (9)
11: [sc 1, dec] x3 (6)
12: sc 6 (6)
Fasten off yarn, leave long end for sewing. Stuff lightly with fluff.
Tail
1: sc 6 in mr (6)
2: inc 6 (12)
3: dec 6 (6)
Fasten off yarn, leave long end for sewing
Tip: When changing color for a more finished look, on the last stitch of the round before your color change, insert your hook and pull a loop through. Then yarn over with your new color and pull through both loops. This will prevent the color change from being visible in the last round!
Face Shaping
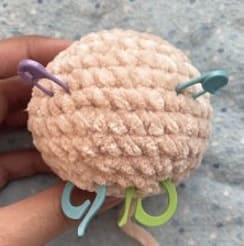
You will be referencing the numbered points in picture 6 for this section. Thread the same yarn used for the head through your needle (or yarn of a similar color).
Insert your needle into the head through point 1 and out through point 2.
Insert needle into head through point 3 and back out through point 1. Pull yarn to tighten the face shaping.
Next insert needle into head through point 4, and out through point 5.
Insert needle into head through point 6 and out through point 4.
Almost done!!
You should have two yarn ends coming from points 1 and 4. Pull them to tighten the face shaping. To hide our finishing knot, sew the yarn ends through opposite spots (1 and 4) and tie ends together inside the head.

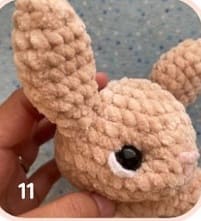
Face Details
Add safety eyes or embroider eye detail between rounds 7 and 8. The eye should be placed in the concave area caused by the face shaping. There will be about 6 sc’s between the eyes.
Sew nose detail between rounds 7 and 8, about 5 sc’s across and 4 sc’s down.
Optional- add white eye detail by sewing yarn out through the head at the bottom corner of the eye and back in through the upper corner. You can change where you place the white detail to change where your bunny is “looking”.
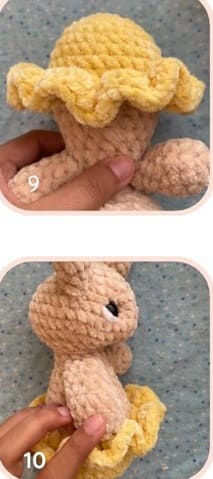
Ruffle Skirt
Using Contrast Color
With the body upside down (the contrast color on top), insert your hook in the first stitch before the color change on round 10. Slip stitch to attach yarn.
1: Hdc 3 times in each raised stitch leftover by the blo round. (90)
2: Hdc around (90) When you get to the end of the round, slip stitch in the first hdc of the round.
Tie off yarn and weave in ends.
Assembly
Sew on head to body. Stuff with extra fluff towards the end of sewing before to make body/neck firm.
Thank you for visiting our website amigurumireceitas.com.
Sew ears onto head on rounds 5-7. Ears should be about 5-6 sc’s from the eye shaping. If using 15mm eyes like in picture 11, ear will be about 3 sc’s from the corner of the eye.
With decreases facing towards the front of the body, sew on arms to body between rounds 15 and 16, right bellow where the head is sewed on.They should be centered with the ears.
With the decreases of the legs facing up, sew legs on round 9, right bellow the ruffle skirt.
Sew tail on right under ruffle skirt, centered with the middle of the head.
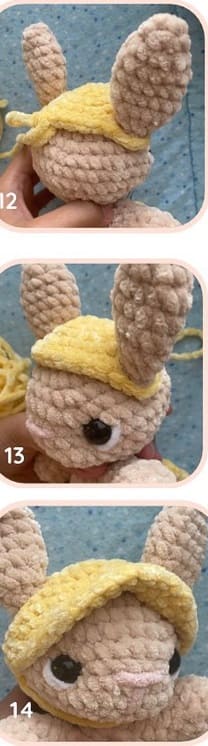
Bonnet/Hat
Using Contrast Color.
1.sc 6 in mr (6)
2.inc 6 (12)
3.[sc 1, inc] x6 (18)
4.[sc 2, inc] x6 (24)
Thank you for visiting our website amigurumireceitas.com.
For this next round, to make sure the hat will fit with where you placed the ears, work around the ears when you reach the chain,
5. sc 5, ch 4 skip 2, inc, sc 8, inc, ch 4 skip 2, sc 5 (30)
6. [sc 4, inc] x6 (36) *sc into chain when you reach each chain.
7-9: sc 36 (36)
In this next round when you chain 10, you will reattach the chain under the bunny’s chain.
10: sc 12, ch 10 skip 20sc, sc 4
11: sc 11, slst
Tie off yarn and weave in the ends with your sewing needle.
*I like to push the front of the hat up slightly to give it a “bonnet” look. This can be made permanent with a simple stitch!*
Congratulations, you have completed the amigurumi bunny .
More Amigurumi Bunny Ideas:


