Hello dear Amigurumi Followers
Today we share Amigurumi Christmas Elf Wreath Free Pattern for you. As you know we share new free amigurumi pattern every day. The main crochets are gazelle, amigurumi bear, pola, crochet panda, penguin, giraffe, llama, pig, bunny, clown, lamb, bee, crochet unicorn, amigurumi doll, fox, penguin, dinosaur, crochet elephant, hippo, monkey, crochet cat, crochet dog and more …
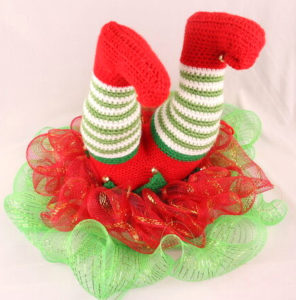
Todays daily new amigurumi free crochet pattern is Amigurumi Christmas Elf Wreath.
I want to give you some informations about this amigurumi free pattern ; Christmas Elf Wreath.

Supplies:
• Yarn 4/Medium Weight Yarn in…
Red, Green, Dark Green, and White
•4mm Crochet Hook
•Tapestry needle
•Scissors
•Stuffing
•10 inch Wreath
•Mesh for Wreath
Additional Information:
Difficulty: Easy
• Before we get started…
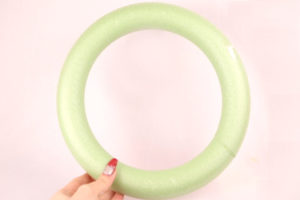
You will need a wreath. I bought a foam wreath (10 inch) from Dollar Tree. However, a wire wreath is better suited for the frilly wreath we’ll be doing. There are video tutorials online showing how to put mesh around a wire wreath, but I will show you how I did mine with a foam wreath.
You’ll also need colorful mesh to go around the wreath. I got 2 rolls from Dollar tree as well. The little bells you can also get from Dollar Tree.
• Let’s Get Started!
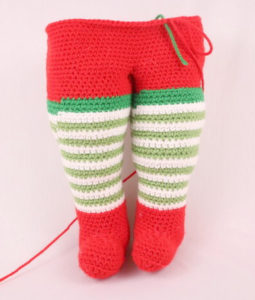
We will first start by making a shoe, this shoe will lead into the lead. We will then make a second leg and crochet both legs together to form the waist area. After this we will make the curly part of the shoe, the green triangles around the waist, and put the mesh around the wreath. Lastly, we will attach the elf to the wreath!
Amigurumi Christmas Elf Wreath Free Pattern
Elf Shoe:
IN RED
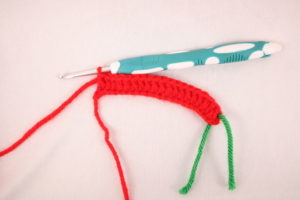
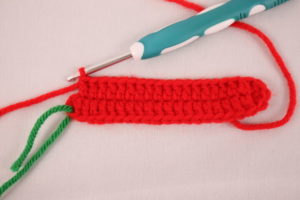
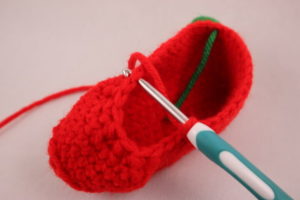
In round 1 we will make a foundation chain. This means we will make a chain, work down one side of the chain, then we turn to the other side of the chain and continue down that side. This will make a round. We are NOT turning the work and crocheting over the stitches we just made! That would be working a row.
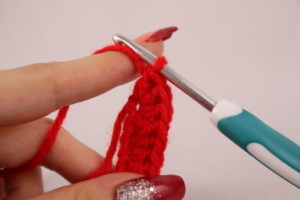
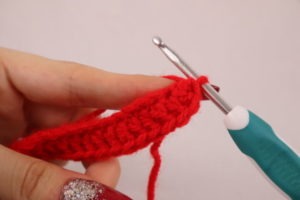
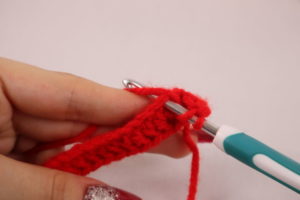
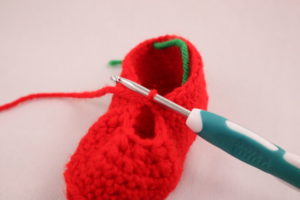
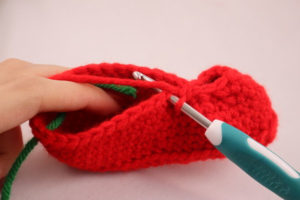
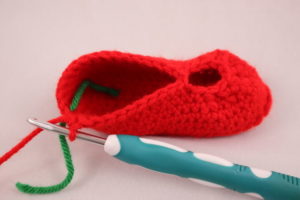
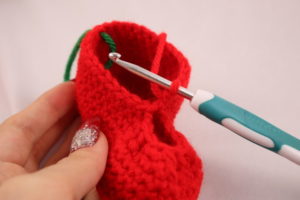
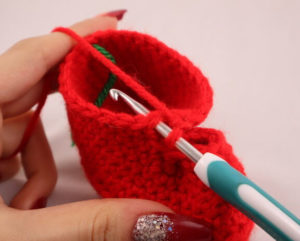
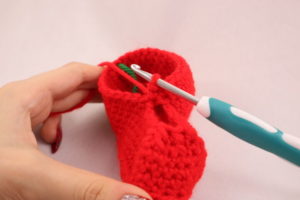
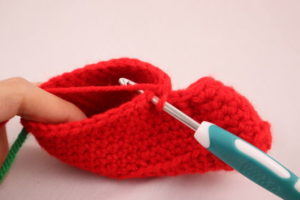
Round 1: Ch 22 Pic 1. Dc in the 3rd Ch from the hook. Dc in the next 18 Ch Pic 2. Dc 3 times in the last Ch Pic 3. Now turn the chain to the opposite side, where we haven’t worked any double crochets yet Pic 4. Dc in the next 18 st Pic 5-6 (40)
Supplies:
• Yarn 4/Medium Weight Yarn in…
Red, Green, Dark Green, and White
•4mm Crochet Hook
•Tapestry needle
•Scissors
•Stuffing
•10 inch Wreath
•Mesh for Wreath
Additional Information:
Difficulty: Easy
• Before we get started…
You will need a wreath. I bought a foam wreath (10 inch) from Dollar Tree. However, a wire wreath is better suited for the frilly wreath we’ll be doing. There are video tutorials online showing how to put mesh around a wire wreath, but I will show you how I did mine with a foam wreath.
You’ll also need colorful mesh to go around the wreath. I got 2 rolls from Dollar tree as well. The little bells you can also get from Dollar Tree.
• Let’s Get Started!
We will first start by making a shoe, this shoe will lead into the lead. We will then make a second leg and crochet both legs together to form the waist area. After this we will make the curly part of the shoe, the green triangles around the waist, and put the mesh around the wreath. Lastly, we will attach the elf to the wreath!
Elf Shoe:
IN RED
In round 1 we will make a foundation chain. This means we will make a chain, work down one side of the chain, then we turn to the other side of the chain and continue down that side. This will make a round. We are NOT turning the work and crocheting over the stitches we just made! That would be working a row.
Round 1: Ch 22 Pic 1. Dc in the 3rd Ch from the hook. Dc in the next 18 Ch Pic 2. Dc 3 times in the last Ch Pic 3. Now turn the chain to the opposite side, where we haven’t worked any double crochets yet Pic 4. Dc in the next 18 st Pic 5-6 (40)

Round 2: *Inc, Dc in the next 4 st* 8 times (48)
Round 2 Pictured Below
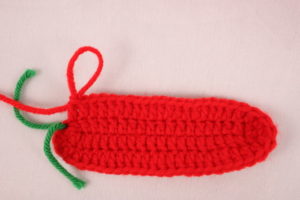
Round 3: In the BLO (Back Loop Only) Sc in the next 48 st (48)
Round 4-6: In BOTH Loops, *Sc* all around (48)
Round 7: Sc in the next 17 st, Repeat *Dec, Sc in the next st* 6 times. Sc in the next 13 st (42)
Round 8: Sc in the next 17 st, *Dec* 6 times, Sc in the next 13 st (36)
Round 8 Pictured Below
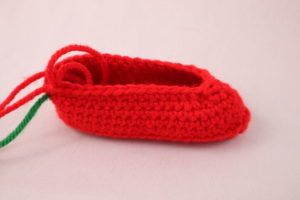
Round 9: Sc in the next 16 st Pic 1. Count the next 9 st and Sc into that 9th st Pic 2-3. Sc in the next 11 st Pic 4-5 (28)
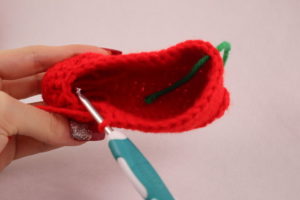
This will create a leg on the shoe. We will also have a hole near the front. Don’t worry, we will just sew it closed later!
Round 10: Sc in the next 16 st Pic 1. Sc in the next st that connects the shoe Pic 2-3. Sc in the next 11 st Pic 4 (28)
Round 11-13: *Sc* all around (28)
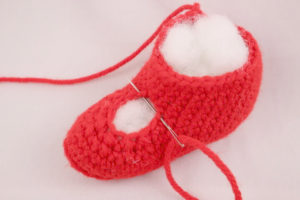
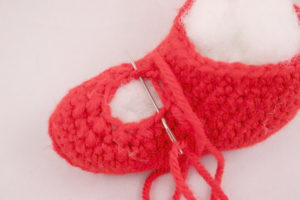
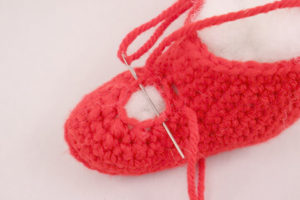
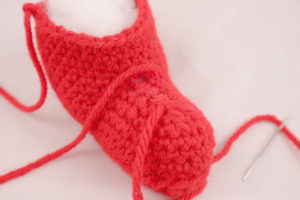
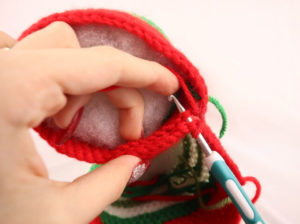
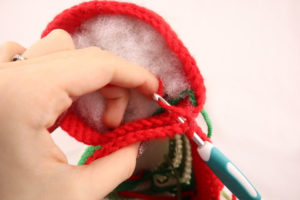
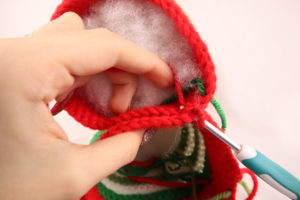
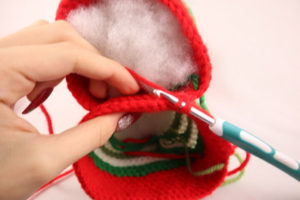
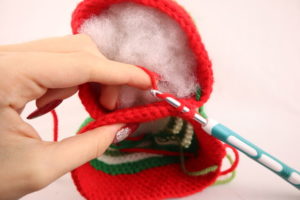
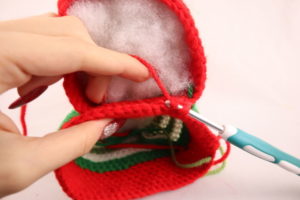
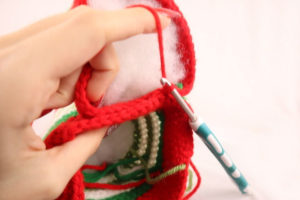
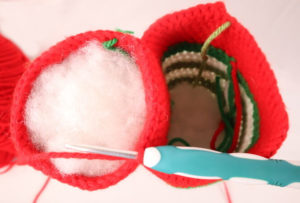
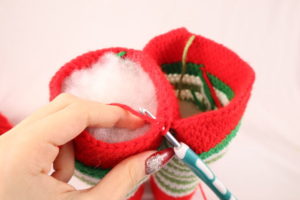
Stuff the shoe here Pic 1. Now we will sew the front hole of the shoe closed. Take a needle with red yarn and sew through the stitches that align Pic 2-5. Grab both tail ends of yarn and pull firmly at the same time to tighten the yarn. Now tie each tail end of yarn into firm knots and bring into the shoe to hide.

Now we make the leg. It’s easy, but we make frequent color changes
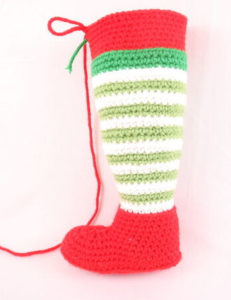
Round 14: Change to White. In the BLO *Sc* all around (28)
Round 15: In BOTH Loops, *Sc* all around (28)
Round 16-17: Change to Green. *Sc* all around (28)
Round 18-19: Change to White. *Sc* all around (28)
Round 20-21: Change to Green. *Sc* all around (28)
Round 22: Change to White. *Sc* all around (28)
Round 23: Repeat *Inc, Sc 3* 7 times (35)
Round 24-25: Change to Green. *Sc* all around (35)
Round 26-27: Change to White. *Sc* all around (35)
Round 28-29: Change to Green. *Sc* all around (35)
Round 30-31: Change to White. *Sc* all around (35)
Round 32: Change to Green. Repeat *Inc, Sc 4* 7 times (42)
Round 33: *Sc* all around (42)
Round 34: Change to White. *Inc, Sc 5* 7 times (49)
Round 35: *Sc* all around (49)
Round 36-37: Change to Green. *Sc* all around (49)
Round 38-39: Change to White. *Sc* all around (49)
Round 40: Change to DARK Green. In the BLO. *Sc* all around (49)
Round 41-42: In BOTH Loops, *Sc* all around (49)
Round 43-47: Change to Red. *Sc* all around (49)
Round 48: In BOTH Loops, *Inc, Sc in the next 6 st* 7 times (56)
Here is where we will do a different pattern depending on which leg you’re making:
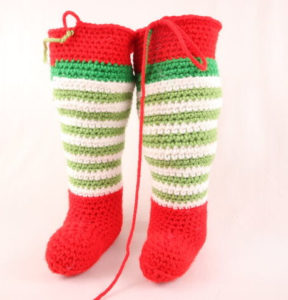
First leg, Round 49: In BOTH Loops, *Sc* all around (56)
Finish off the first leg here, keep the stitch marker in this leg, we will need it later. Stuff now.
Continue on the next section for the second leg.
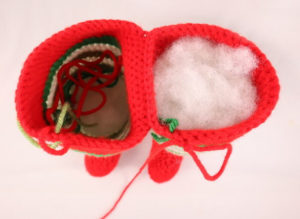
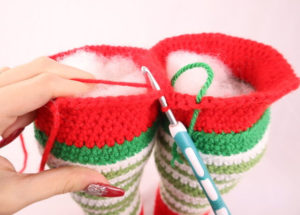
Second leg, Round 49: Sc in the next 3 st Pic 1. Take the first leg made and count 12 stitches to the right of the stitch marker Pic 2.
Next we will Sc going through BOTH the first and second leg.
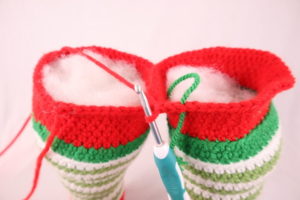
While your hook is still in the working loop of the second leg Pic 3, also insert your hook into that 12th stitch on the first leg Pic 4. Now insert hook into the next stitch of the first leg Pic 5. Yarn over and pull up a loop Pic 6-8.

Yarn over and pull through both loops at the same time Pic 9-11. This makes 1 single crochet.
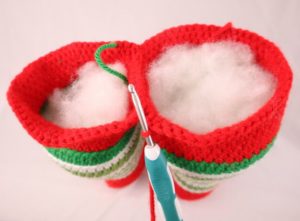
Continue working through BOTH the first and second leg. Sc in the next 10 st Pic 12-13. Continuing on the second leg (the left leg), Sc in the next 42 st Pic 14-15.
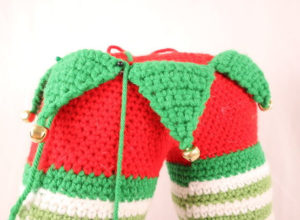
Round 50: Sc in the next 3 st Pic 1. Now we will work on the other leg. Sc in the next 45 st Pic 2-3. Now we meet the other leg. Sc in the next 42 st Pic 4-5 (90)
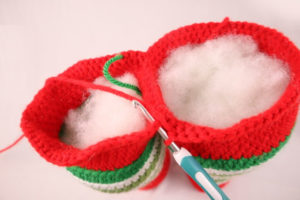
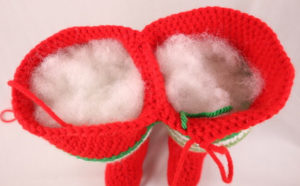
Round 51-60: *Sc* all around (90)
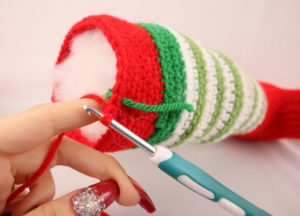
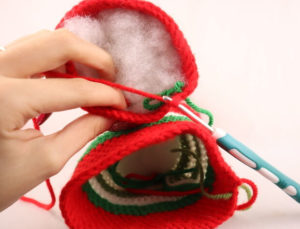
Stuff here. Continue stuffing after each round.
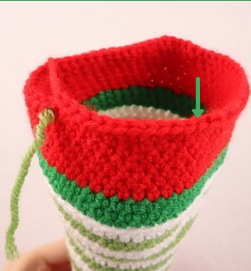
Round 61: In the BLO, *Dec, Sc 7* 10 times (80)
Round 62: In BOTH Loops, *Dec, Sc 6* 10 times (70)
Round 63: *Dec, Sc 5* 10 times (60)
Round 64: *Dec, Sc 4* 10 times (50)
Round 65: *Dec, Sc 3* 10 times (40)
Round 66: *Dec, Sc 2* 10 times (30)
Round 67: *Dec, Sc 1* 10 times (20)
Round 68: *Dec* all around (10)
Round 69: *Dec* all around (5)
Finish off and sew closed.
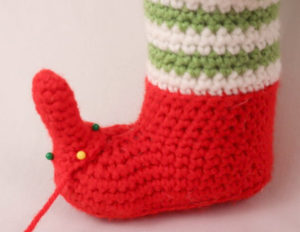
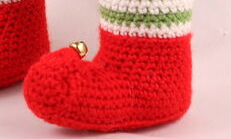
Shoe Tip:
IN RED

Round 1: 6 Sc into a Magic Ring (6)
Round 2: *Inc, Sc* all around (9)
Round 3-9: *Sc* all around (9)
Round 10: Repeat *Inc, Sc in the next st* 4 times, Sc in the last st (13)
Round 11: *Inc in the next st, Sc in the next 2 st* 4 times, Sc last st (17)
Finish off, leaving a long tail for sewing.
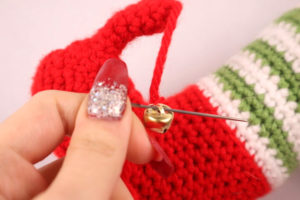
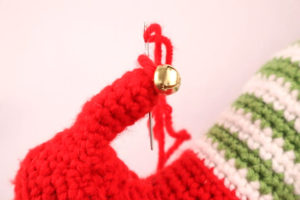
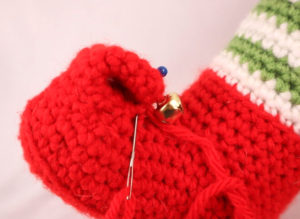
Pin this piece to the tip of the shoe as shown Pic 1. Sew on, and after sewing on bring the yarn up to the very tip of the piece Pic 2. Bring this yarn through a bell Pic 3, and reinsert needle into the tip to secure the bell Pic 4. Pin the piece down as shown Pic 5, and sew on going from the shoe to the tip piece Pic 6. Weave in any ends!
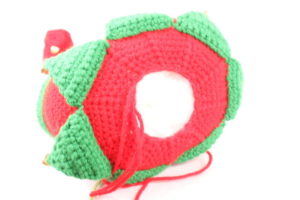
Waist Frills: (Make 8)
IN GREEN
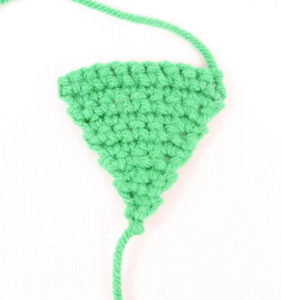
Row 1: Ch 2. Sc in the 2nd Ch from the hook (1)
Row 2: Ch 1 & turn. *Inc* in the next st (2)
Row 3: Ch 1 & turn. *Sc* in the next 2 st (2)
Row 4: Ch 1 & turn. *Inc* in the next 2 st (4)
Row 5: Ch 1 & turn. *Sc* in the next st (4)
Row 6: Ch 1 & turn. *Inc* in the next st, Sc in the next 2 st, *Inc* in the next st (6)
Row 7: Ch 1 & turn. *Sc* in the next 6 st (6)
Row 8: Ch 1 & turn. *Inc* in the next st, Sc in the next 4 st, *Inc* in the last st (8)
Row 9: Ch 1 & turn. Sc in the next 8 st (8)
Row 10: Ch 1 & turn. *Inc* in the first st, Sc in the next 6 st, *Inc* in the next st (10)
Row 11: Ch 1 & turn. Sc in the next 10 st (10)
Finish off, leaving a long tail for sewing.
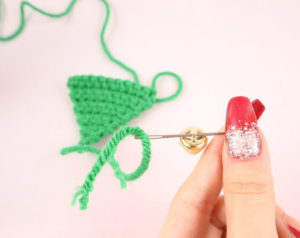
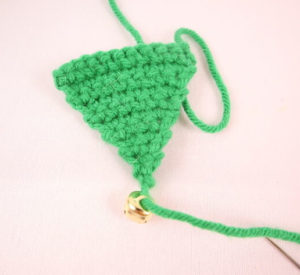
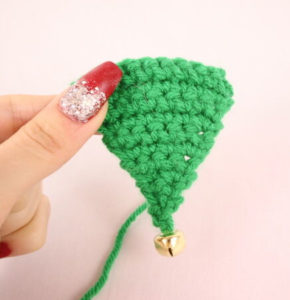
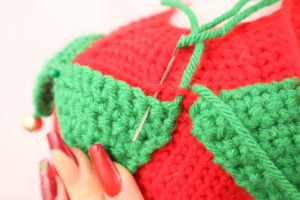
Assembly:
Take the tail end of yarn left at the very tip of the triangle and sew it through a bell Pic 1-2. Weave this tail end of yarn back through the triangle to secure Pic 3-4. Pin the triangle to the waist, right on Round 60 Pic 5. Sew the triangle on, going through the front loops left from Round 61 Pic 6.

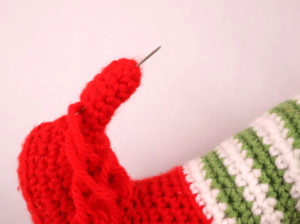
Leg Assembly:
IN GREEN
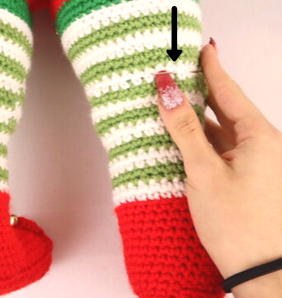
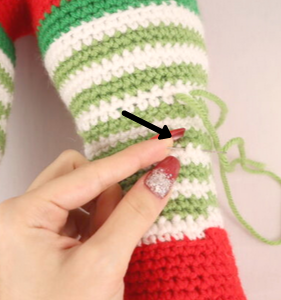
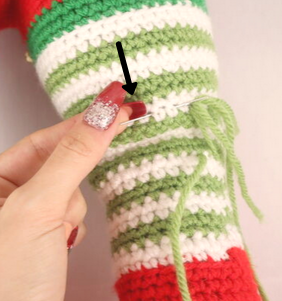
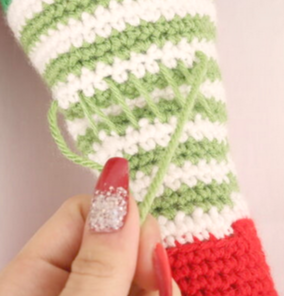
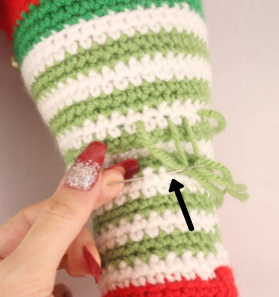
To make the elf look like he’s fallen in the wreath, we need to bend his leg slightly. Here is how we do that!
Insert needle with green yarn into the 5th white stripe on the right leg, and pull needle out a stitch to the left Pic 1. Reinsert needle on the 3rd right stripe, lining up to where you’d previously pulled in and out the needle Pic 2. Reinsert needle on the 5th white stripe, next to where you previously had sewed. Pull the needle out about 2 stitches to the left Pic 3. Reinsert needle into the 3rd stripe, next to where you previously had sewed. Pull the needle out about 2 stitches to the left Pic 4. Repeat this process until you’ve sewed the back of the leg. Pull both tail ends of yarn firmly at the same time to tighten the leg Pic 5-6. Tie the ends of yarn into firm knots and weave in to hide.
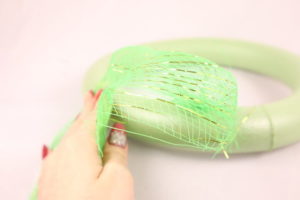
Wreath Assembly:
If you know how to make your own wreath, feel free to do so! However, this was my first wreath ever and I just made do with the supplies I had.
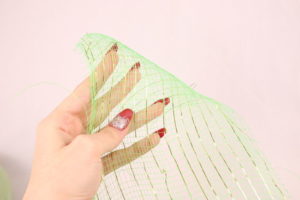
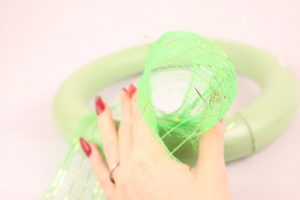
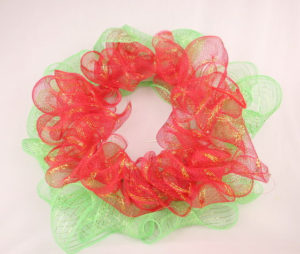
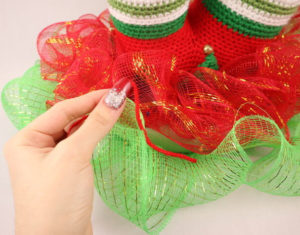
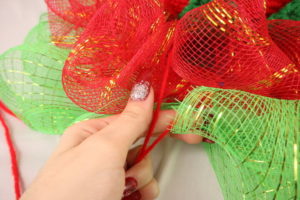
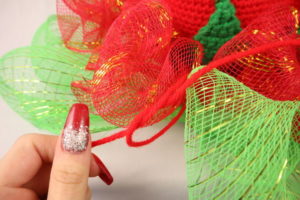
Take a wreath (I am using a foam wreath from Dollar Tree, they also have wire wreaths that are better suited for making frilly wreaths like this. I just didn’t know at the time that a foam wreath is more for flowers). Now take mesh and bunch it up at the very tip and place it on the wreath Pic 3. Place a pin to secure this mesh, try to make sure the pin goes through all layers of the mesh Pic 4.
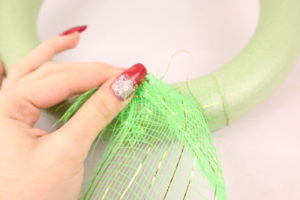
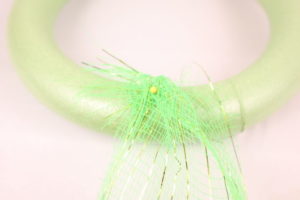
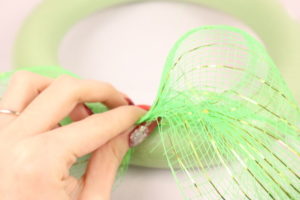
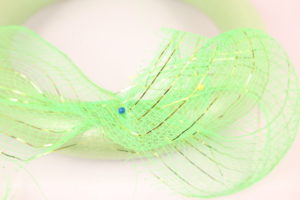
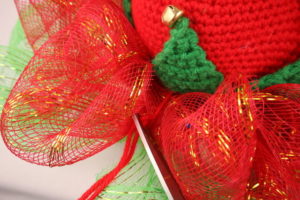
Grab a section of the mesh and bring it to close to the previous mesh you pinned, it should make what looks like a loop Pic 5-6. Bunch this area up close to the wreath Pic 7, and place a pin going through all layers of the mesh Pic 8-9. Repeat this process all around. I did red mesh first and closer to the center, then repeated the same process with green mesh at the outside of the wreath.
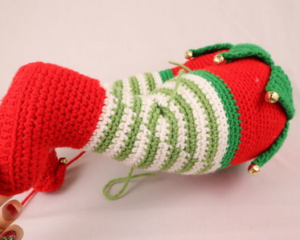
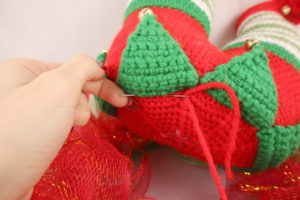
Attaching Elf to Wreath:
We will attach the elf to the wreath by tying him to it. This secures it really well and you won’t see the yarn as long as you use a color that matches your wreath’s mesh.
Do these steps only on the left and right side of the elf. You can also do these steps for the top of the elf if you need to secure it more.
Take a 8″ piece of yarn and place it on a needle Pic 1. Bring this yarn through the wreath as shown Pic 2. Insert the needle through the elf and pull the needle out about 4 stitches to the left Pic 3. This yarn through now be at the top of the wreath. Grab both tail ends of yarn and pull them very firmly so the elf is close to the wreath Pic 4. Tie these tail ends of yarn firmly together a few times and cut the excess yarn Pic 5-6.
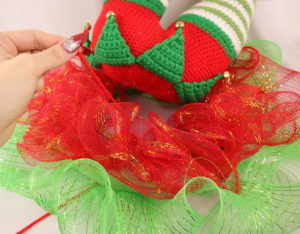
Repeat this a total of 2 times on the left and right side of the elf, as well as once at the top of the elf.