Hello dear Amigurumi Followers
Today we share Amigurumi Clovis The Duck Free Pattern for you. As you know we share new free amigurumi pattern every day. The main crochets are gazelle, amigurumi bear, pola, crochet panda, penguin, giraffe, llama, pig, bunny, clown, lamb, bee, crochet unicorn, amigurumi doll, fox, penguin, dinosaur, crochet elephant, hippo, monkey, crochet cat, crochet dog and more …
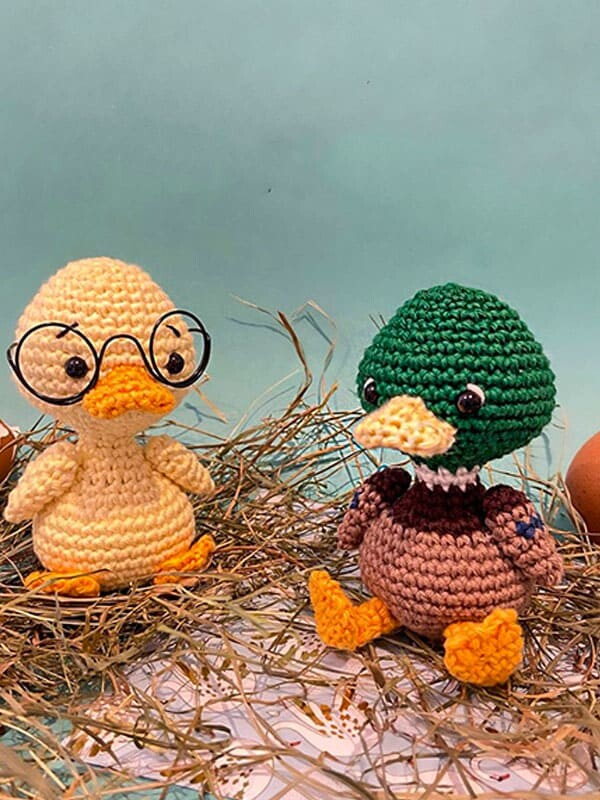
Todays daily new amigurumi free crochet pattern is Amigurumi Clovis The Duck.
I want to give you some informations about this amigurumi free pattern ; Clovis The Duck.
Materials
• Cotton ricorumi (green, white, brown, light brown, blue, yellow, orange) Crochet hook : 3 mm
• Yarn needle
• Fiberfill for stuffing Safety eyes (6 mm) Stitch marker
• Scissors
Abbreviations
Rnd– round/ tour
MR– magic ring
ch– chain
slst– single crochet
inc– increase
dec– decrease
()*-repeat till the end of round
Let’s start crocheting the amigurumi duck pattern.
Are you ready?
Let’s crochet the body and head part of the Amigurumi duck pattern.
Amigurumi Clovis The Duck Free Pattern
Head & body
In green:
Rnd 1. MR + 6 sc (6)
Rnd 2. 6 x inc (12)
Rnd 3. (1 sc, inc)* (18)
Rnd 4. 18 sc (18)
Rnd 5. (1 sc, inc, 1 sc)* (24)
Rnd 6. 24 SC (24)
Rnd 7. (3 sc, inc)* (30)
Rnd 8. (2 sc, inc, 2 sc)* (36)
Rnd 9. (5 sc, inc)* (42)
Rnd 10-13. 42 sc (42)
In round 11, mark the 17th and 25th stitch (picture 1), in order to put the eyes later.
Rnd 14. (5 sc, dec)*(36)
Rnd 15. (2 sc, dec, 2 sc)* (30)
Rnd 16. (3 sc, dec)* (24)
Insert the security eyes where you placed the stitch markers and begin to stuff.
Rnd 17. (1 sc, dec, 1 sc)* (18)
Rnd 18.(1 sc, dec)* (12)
Stuff firmly the head.
Change color to white for the neck:
Rnd 19. (4 sc, dec)* (10)
Rnd 20. 10 sc (10)
Change color to brown for the body:
Rnd 21. (2 sc, inc, 2 sc)* (12)
Rnd 22. (3 sc, inc)* (15)
Rnd 23. (2 sc, inc, 2 sc)* (18)
Rnd 24. (1 sc, inc, 1 sc)* (24)
Change to light brown:
Rnd 25. (3 sc, inc)* (30)
Rnd 26. (2 sc, inc, 2 sc)* (36)
Rnd 27-30. 36 sc (36)
Next round you will make the tail (picture 2), make sure the tail is in the middle of the back. If necessary, add or undo some stitches.
Rnd 31: 3 sc, change to brown and work in front loop :(ch 5, sc in next st, ch 6, sc in next st, ch 5, sc in next st = 3 sc), with light brown continue till end of round in both loops 30 sc (36)
Rnd 32. for 4th to 6th stitch use back loop of RND 31 -> (2 sc, dec, 2 sc)* (30)
Rnd 33. (3 sc, dec)* (24). Stuff.
Rnd 34. (1 sc, dec, 1 sc)* (18)
Rnd 35. (1 sc, dec)* (12)
Rnd 36. 6 x dec [6]. Finish stuffing.
Close and fasten off.
After completing the head part of the amigurumi pattern, let’s crochet the beak part. Yellow yarn was preferred to make the beak part.
Beak
In yellow
ch 6
Rnd 1. 4 sc, 3 sc in last st, 3 sc, inc (12)
Rnd 2. 12 sc (12)
Rnd 3. 2 sc, 2 x inc (upper shape of the beak: picrure 3), 8 sc (14) + slst
Fasten off and leave a tail for sewing to head.
Let’s crochet the legs of the amigurumi toy. Yellow yarn is preferred for the legs.
Legs (x 2)
In orange
Rnd 1. MR + 5 sc (5) – use a long tail to start the magic ring. Then bring it out in order to sew the leg later to the body (picture 4)
Rnd 2-3. 5 sc (5)
Fasten off and leave a tail for sewing to feet.
Let’s crochet the wings of the amigurumi duck pattern. You can choose the thread color for the wings as you wish.
Wings (x 2)
Start in brown:
Rnd 1. MR + 6 sc (6)
Rnd 2. (1 sc, inc)* (9)
Change to light brown:
Rnd 3. 9 sc (9)
Rnd 4. 3 sc, 4 sc in blue, 2 sc in light brown (9)
Rnd 5. 9 sc (9)
Rnd 6. (1 sc, dec)*(6)
Rnd 7. 6 sc (6)
Close and bring out the thread in the inside of the wing, on upper side (picture 5)
Feet (x 2)


In orange:
Rnd 1. MR + 4 sc (4)
Rnd 2. (1 sc, inc)* (6)
Rnd 3. (1 sc, inc)* (9)
Rnd 4-5. 9 sc (9)
Flatten the foot, crochet through both layers
Rnd 6. (1 sc, ch 2, 1 sc) in same stitch x 3, 1 slst.
Fasten off.
Assembly
• Sew the beak with the upper between the eyes.
• Sew legs and feet together, then legs to body.
• The legs are optional, you can make only the feet and sew them directly to the body, it will make it look like a duckling.
• Aling the brown parts of the wings and the body before sewing.
• You can use different colors to make a white or yellow duckling. Details always make the difference!
Congratulations, you have completed the amigurumi Clovis The Duck pattern.
More Amigurumi Duck Ideas:


