Hello dear Amigurumi Followers
Today we share Amigurumi Easy Lacy Hairband Free Pattern for you. As you know we share new free amigurumi pattern every day. The main crochets are gazelle, amigurumi bear, pola, crochet panda, penguin, giraffe, llama, pig, bunny, clown, lamb, bee, crochet unicorn, amigurumi doll, fox, penguin, dinosaur, crochet elephant, hippo, monkey, crochet cat, crochet dog and more …
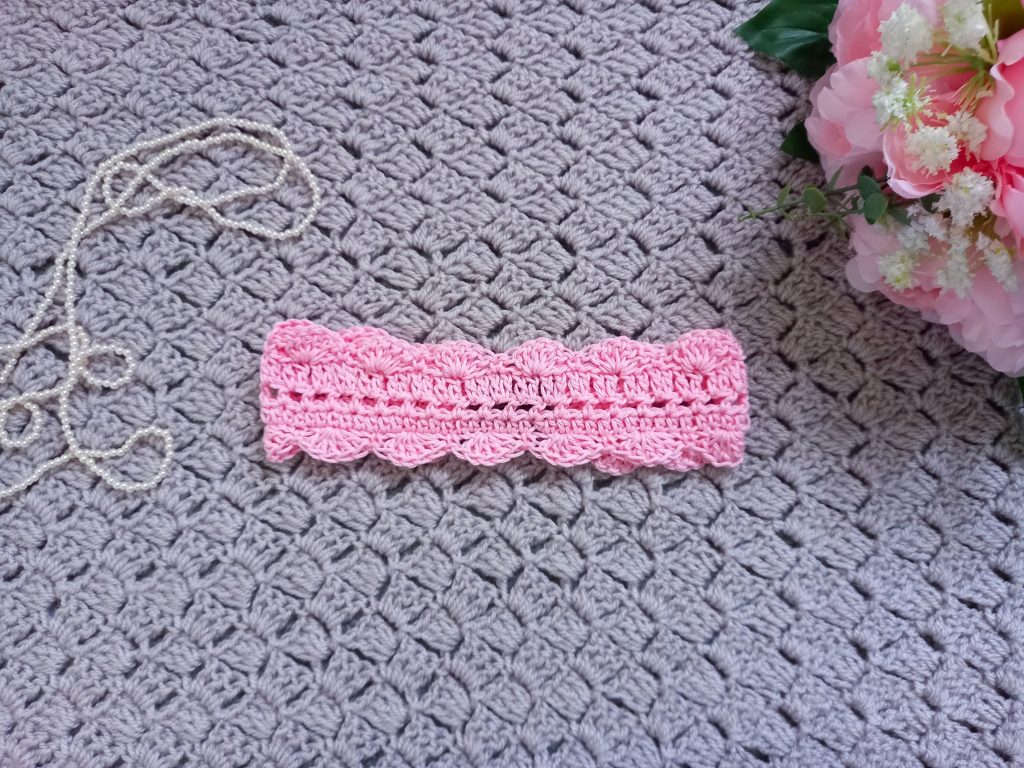
Todays daily new amigurumi free crochet pattern is Amigurumi Easy Lacy Hairband.
I want to give you some informations about this amigurumi free pattern ; Easy Lacy Hairband.
Level: Easy
Gauge
10 HDC= 2,5” (6 cm)
3 rows = 1,2” (3 cm)
Approximate size of finished project before sewing (excluding hair elastic)
2”x16,5” (5,5 cm x 42 cm)
Materials
1 skein of Drops Muskat in shade Powder Pink 05 (or any other cotton yarn in DK/Light 3 yarn)
A 4 mm crochet hook
A tapestry needle
A pair of scissors
A simple hair elastic
Abbreviations
I will be writing in US terms (British terms in brackets)
Ch: chain
Sk: skip
SP: space
Sl st: Slip stitch
SC: Single Crochet (UK Double Crochet)
DC: Double Crochet (UK Treble Crochet)
HDC: Half Double Crochet (UK Half Treble Crochet)
EOR: End of row
Amigurumi Easy Lacy Hairband Free Pattern
Pattern
Ch 70
Complete rows as follows:
1: HDC in 3rd ch from hook (first 2 ch counts as a HDC), HDC into each ch until EOR
2: Ch 3 (=HDC+1 ch sp), turn your work, HDC into 3rd stitch from hook, *ch 1, sk 1 ch, HDC in next st* until EOR
3: Ch 2 (=HDC), HDC into 2nd st, and into every st (both ch sp and HDC from previous row) until EOR
4 (Shell stitch edging): Ch 1 (=turning chain), turn your work, SC into 1st stitch, sk 1 stitch, 5 DC into next stitch (=shell), sk 2 stitches, SC into next stitch, [sk 2 stitches, 5 DC into next stitch, sk 2 stitch, SC into the next stitch] until last 3 stitches. Sk 2 stitches, 2 DC into last stitch to finish row.
Fasten off, leaving a long tail for sewing.
Repeat row 4 (shell stitch edging) on the other side of the project
Take your project and turn it around, so as to work on the other side of it. This is the side of the beginning chains.
You need to repeat the shell stitch edging on the other side of the headband.
Attach yarn to project. Ch 1 (=turning chain), turn your work, SC into 1st stitch, sk 1 stitch, 5 DC into next stitch (=shell), sk 2 stitches, SC into next stitch, [sk 2 stitches, 5 DC into next stitch, sk 2 stitch, SC into the next stitch] until last 3 stitches. Sk 2 stitches, 2 DC into last stitch to finish row.
Fasten off.

To sew elastic band onto project
Take elastic and place a knot into the middle of it; sew one side of headband to the elastic with tapestry needle, making sure you sew the entire width of the headband to elastic; making sure you don’t twist project, sew on second side to other side of elastic.
Fasten off, tidy up all loose ends.
More Amigurumi Hair Band Ideas:
