Hello dear Amigurumi Followers
Today we share Amigurumi Santa’s Little Kitty Helpers Free Pattern for you. As you know we share new free amigurumi pattern every day. The main crochets are gazelle, amigurumi bear, pola, crochet panda, penguin, giraffe, llama, pig, bunny, clown, lamb, bee, crochet unicorn, amigurumi doll, fox, penguin, dinosaur, crochet elephant, hippo, monkey, crochet cat, crochet dog and more …
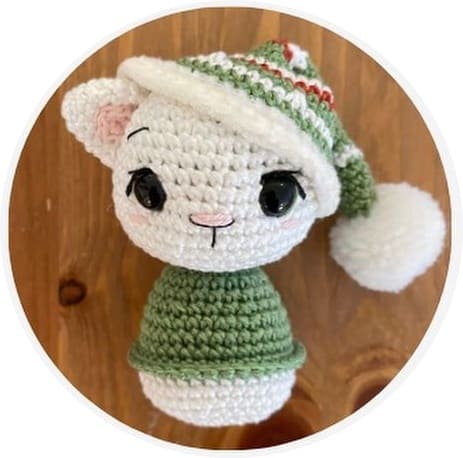
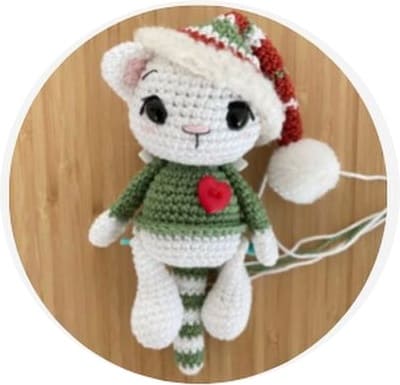
Todays daily new amigurumi free crochet pattern is Amigurumi Santa’s Little Kitty Helpers.
I want to give you some informations about this amigurumi free pattern ; Santa’s Little Kitty Helpers.

Materials
• Cotton yarn 8/4 (for example Sheepjes Catona, Schachenmayr Catania)
• Katia velvet, Alpaca Boucle or Baby Smiles Lenja Soft for the fringe on the hat
• Safety eyes 10 mm
• Cotton threads in white/black/blue for the eyes, rose for the nose and cheeks
• Thin embroidery thread for the details (white/black)
• Crochet hook size 2.5 mm
• Scissors
• Blunt needle, pointed needle (to deepen the eyes)
• Stitch marker, fixing pins
• Fiberfill
• Small button for the jumper
• Pompon for the hat (you can make one yourself for example with a fork)
Abbreviations
• MR-magic ring
• Rnd– round
• Sc– single crochet
• Sl st– slip stitch
• Ch– chain
• Inc– increase
• Dec– decrease
• FLO-front loops only
• BLO-back loops only
• NS– needle size
Color codes Scheepjes Catona
Sage Green (212)
Snow White (106)
Rust (388)
Amigurumi Santa’s Little Kitty Helpers Free Pattern
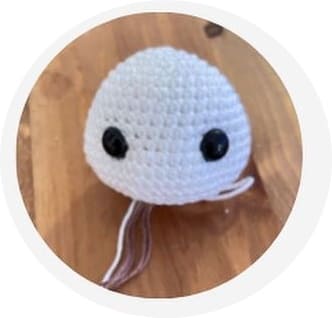
Head and Body
Start with white
Rnd 1: 6 sc in MR (6)
Rnd 2: (inc)*6 (12)
Rnd 3: (1sc,inc)*6 (18)
Rnd 4: (2sc,inc)*6 (24)
Rnd 5: (3sc,inc)*6 (30)
Rnd 6: 30sc (30)
Rnd 7: (4sc,inc)*6 (36)
Rnd 8-9: 36sc (2rounds) (36)
Rnd 10: (5sc,inc)*6 (42)
Rnd 11: 42sc (42)
Rnd 12: (6sc,inc)*6 (48)
Rnd 13-14: 48sc (2rounds) (48)
Rnd 15: (6sc,dec)*6 (42)
Place the safety eyes between rounds 11 and 12 with a distance of 7 or 8 visible stitches between them.
Rnd 16: (5sc,dec)*6 (36)
Rnd 17: (4sc,dec)*6 (30)
Rnd 18: (3sc,dec)*6 (24)
Stuff the head firmly with fiberfill and keep on stuffing as you go.
Rnd 19: (dec)*12 (12)
Rnd 20: 12sc in FLO (12)
Do not cut the yarn. Shape the head a little while you stuff. Deepen the eyes to make your cat look a little more cute (there are a lot of tutorials how to deepen the eyes).
Continue with the body.
Colour change to red or green
Rnd 21: (inc)*12 (24)
Rnd 22-23: 24sc (2rounds) (24)
Rnd 24: (3sc,inc)*6 (30)
Rnd 25: (4sc,inc)*6 (36)
Rnd 26-28: 36sc (3rounds) (36)
Colour change to white
Rnd 29: 36 in BLO (36)
Rnd 30-31: 36sc (2rounds) (36)
Rnd 32: (4sc,dec)*6 (30)
Rnd 33: (3sc,dec)*6 (24)
Stuff the body firmly with fiberfill and keep on stuffing as you go.
Rnd 34: (2sc,dec)*6 (18)
Rnd 35: (1sc,dec)*6 (12)
Rnd 36: (dec)*6 (6)
Use your yarn needle to weave the yarn tail through the front loops of the 6 st (rnd 36).
Pull the yarn gently to close the ring and weave in the yarn tail through the finishing circle.
Cuffs on the jumper: turn your cat upside down and start crocheting in the front loops of rnd 29. Finish the round with a slip stitch, tie a knot and hide the yarn tails inside the detail.

Ears (Make 2)
(white)
Rnd 1: 6sc in MR (6)
Rnd 2: (1sc,inc)*3 (9)
Rnd 3: 9sc (9)
Rnd 4: (2sc,inc)*3 (12)
Rnd 5: (3sc,inc)*3 (15)
Cut the yarn, leaving a long tail for assembly.
Don’t stuff or crochet the ears together.
Inside of the ears (Make 2)
(Rose)
Rnd 1: 6 sc in MR (6)
Finish with a sl st into the MR. Cut the yarn, leaving a long tail for attaching the insides of the ears to the lower center of the ears.
Note: The elvish hat does not fit so well on the head with two ears. If you want to have your kitten with a elvish hat, then you only need to crochet one ear.

Arms (Make 2)
Start with white
Rnd 1: 6sc in MR (6)
Rnd 2: (inc)*6 (12)
Rnd 3-5: 12sc (3rounds) (12)
Change to colour to red or green
Rnd 6: (2sc,dec)*3 (9)
Rnd 7: 9sc in BLO (9)
Rnd 8-14: 9sc (7rounds) (9)
Don’t stuff the arm.
If necessary crochet 1-2 additional sc so that the colour change is on the back of the arm and close with 4sc through both layers.
Cut the yarn, leaving a long yarn tail for assembly.
Cuffs: Turn the arm upside down and crochet in the FLO of rnd 7. Finish the round with a sl st, tie a knot and hide the yarn tails inside the detail.
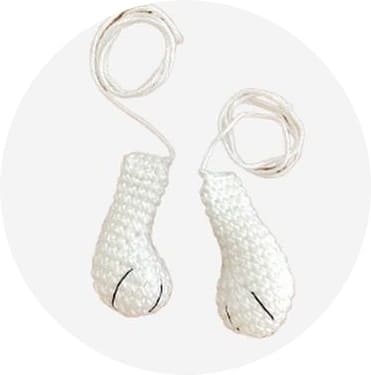
Legs (Make 2)
(White)
Rnd 1: 6sc in MR (6)
Rnd 2: (inc)*6 (12)
Rnd 3: (1sc,inc)*6 (18)
Rnd 4: (5sc,inc)*3 (21)
Rnd 5: 21 sc (21)
Rnd 6: (5sc,dec)*3 (18)
Rnd 7: 7sc,(dec)*2,7sc (16)
Rnd 8: 5sc,(dec)*3,5sc (13)
Rnd 9: 6sc,dec,5sc (12)
Rnd 10: 12sc (12)
Rnd 11: dec,8sc,dec (10)
Stuff the legs until here, the upper part will not be filled.
Rnd 12-15: 10sc (4rounds) (10)
Crochet 1-2 additional sc so that the folded edge is parallel to the foot and close with 4sc through both layers.
Cut the yarn, leaving a long tail for assembly.
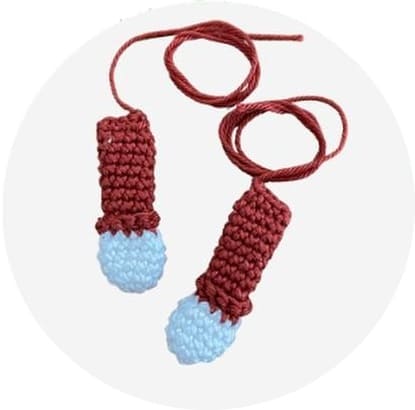
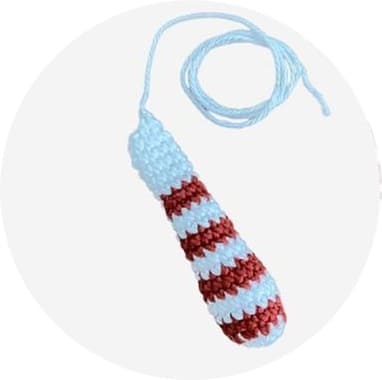
Candy Cane Tail
Start with white
Rnd 1: 6sc in MR (6)
Rnd 2: (inc)*6 (12)
Change colour to red
Rnd 3: (3sc,inc)*3 (15)
Rnd 4: 15sc (15)
Change colour white
Rnd 5-6: 15sc (2rounds) (15)
Change colour red
Rnd 7-8: 15sc (2rounds) (15)
Change colour to white
Rnd 9: (3sc,dec)*3 (12)
Rnd 10: 12sc (12)
Change colour to red
Rnd 11-12: 12sc (2rounds) (12)
Change colour to white
Rnd 13-14: 12sc (2rounds) (12)
Change colour to red
Rnd 15: 12sc (12)
Rnd 16: (2sc,dec)*3 (9)
Change colour to white
Rnd 17-21: 9sc (5rounds) (9)
Rnd 22: (1sc,dec)*3 (6)
Stuff the tail slightly with fiberfill until rnd 14, cut the yarn, leaving a long yarn tail for assembly.
Use your yarn needle to weave the yarn tail through the front loops of the 6 sts (rnd 22) and pull gently to close the tail.
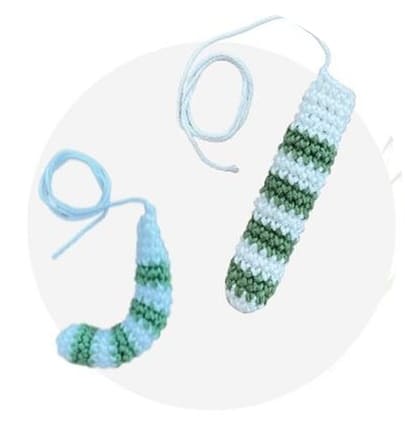
Version 2
(if you want to bend the tail then stuff a pipe cleaner into the tail)
Start with white
Rnd 1: 6sc in MR (6)
Rnd 2: (inc)*6 (12)
Change colour to green
Rnd 3-4: 12sc (2rounds) (12)
Change colour to white
Rnd 5-6: 12sc (2rounds) (12)
Rnd 7-16: Repeat the pattern of rnd 3-6 untill you have a total of 16 rounds. The last two rounds should be green.
Change colour to white
Rnd 17: 12sc (12)
Rnd 18: (2sc,dec)*4 (9)
Rnd 19-21: 9sc, (3rounds) (9)
Stuff the tail slightly until rnd 18, crochet 3 additional sc, fold and close the tail with 4sc. Cut the yarn, leaving a long yarn tail for assembly.
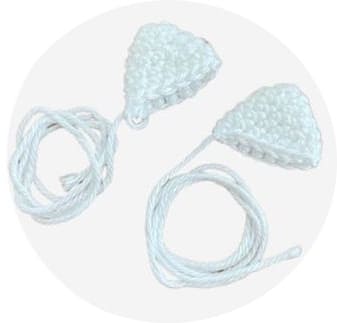
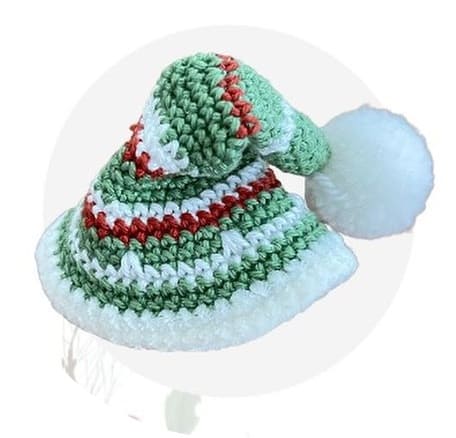
Elvis Hat
Start with green
Rnd 1: 6sc in MR (6)
Rnd 2: 6sc (6)
Rnd 3: (1sc,inc)*3 (9)
Rnd 4-6: 9sc (3rounds) (9)
Change colour to white
Rnd 7: 9sc (9)
Change colour to green
Rnd 8: (2sc,inc)*3 (12)
Rnd 9-10: 12sc (2rounds) (12)
Change colour to red
Rnd 11: 12 sc (12)
Change colour to green
Rnd 12: (3sc,inc)*3 (15)
Rnd 13-14: 15sc (2rounds) (15)
Rnd 15: (4sc,inc)*3 (18)
Change colour to white
Rnd 16-17: 18sc (2rounds) (18)
Change colour to red
Rnd 18: (5sc,inc)*3 (21)
Change colour to green
Rnd 19: 21sc (21)
Rnd 20: (6sc,inc)*3 (24)
Rnd 21: 24sc (24)
Change colour to white
Rnd 22: (3sc,inc)*6 (30)
Change colour to red
Rnd 23: 30sc (30)
Change colour to green
Rnd 24: (4sc,inc)*6 (36)
Rnd 25: 36sc (36)
Change colour to white
Rnd 26: (5sc,inc)*6 (42)
Crochet the inc into the previous round to make the pattern
Change colour to green
Rnd 27-28: 42sc (2rounds) (42)
Velvet white/ or mix with alpaca boucle, first check if the hat fits.
Rnd 29: (6sc,inc)*6 (48)
Rnd 30: 48sc (48)
Cut the yarn and finish off by hiding the tail on the inside of the hat.
For my hat ı used a finished pompom but you can make one yourself. Attach the pompom to the tip of the hat.
Christmas Hat
(Crochet loosely or use NS 3.00 mm)
Start with red
Rnd 1: 6sc in a MR
Rnd 2: 6sc
Rnd 3: (1sc,inc) x3
Rnd 4-7: 9sc (4rounds)
Rnd 8: (2sc,inc) x3
Rnd 9-11: 12sc (3rounds)
Rnd 12: 3sc,inc x3
Rnd 13-14: 15sc (2rounds)
Rnd 15: (4sc,inc) x3
Rnd 16-17: 18sc (2rounds)
Rnd 18: (5sc,inc) x3
Rnd 19: 21sc
Rnd 20: (6sc,inc) x3
Rnd 21: 24sc
Rnd 22: (3sc,inc) x6
Rnd 23: 30sc
Rnd 24: (4sc,inc) x6
Rnd 25: 36sc
Rnd 26: (5sc,inc) x6
Rnd 27: 30sc, ch6, skip 6 sts, 6sc
Check if the hat fits before you proceed, maybe you need to chain 7 or 8 for the ear gap.
Rnd 28: 42sc
Change to Velvet fine /Alpaca Boucle
Rnd 29-30: 42sc (2rounds)
Cut the yarn and finish off by hiding the tail on the inside of the hat.
Completion Of The Head
For the eyes I used a green / blue cotton thread. For Misty’s eyes I embroidered an additional white edge next to the green.
For the eyelid I used a black cotton thread and the eye lashes are embroidered with thin embroidery yarn.
Embroider the nose with a rose cotton thread in Rd 12. It is 3sc long. Use a thin black embroidery thread to make the details around the nose.
Embroider the eyebrows with a thin black embroidery thread. Embroider them slightly crooked over 2 stitches starting in Rd7 with a distance of 7sc in between.
If you like you can embroider rosy cheeks underneath the eyes (they are 2sc long). This free pattern is shared by lovelycraft.com with permission from the pattern owner.
If you have crocheted a hat then attach the left ear on the side of the head from Rd5 to Rd11. Attach the hat onto the right side of the head. Attach the end of the hat with a few stitches as well so that it stays bent down.
If you haven’t crocheted a hat then attach the right ear iddentical to left one on the other side.
Completion Of The Body
Attach the arms slightly tilted on the side of the body (directly underneath the head).
Attach the legs on the left and right side one round underneath the jumper.
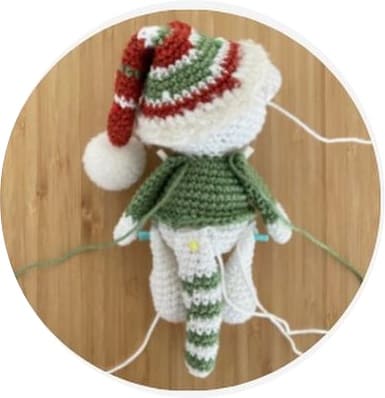
Attach the tail in the center of the back directly underneath the jumper.
Finally embroider some details on the feet using a thin black embroidery thread (to make them look like paws).
Embroider 3 lines to make 4 parts that create the paw.
Embroider a snowflake or sew a button onto the jumper.
More Amigurumi Santa Claus Helper Ideas:


