Hello dear Amigurumi Followers
Today we share Amigurumi Winter Bunny Free Pattern for you. As you know we share new free amigurumi pattern every day. The main crochets are gazelle, amigurumi bear, pola, crochet panda, penguin, giraffe, llama, pig, bunny, clown, lamb, bee, crochet unicorn, amigurumi doll, fox, penguin, dinosaur, crochet elephant, hippo, monkey, crochet cat, crochet dog and more …
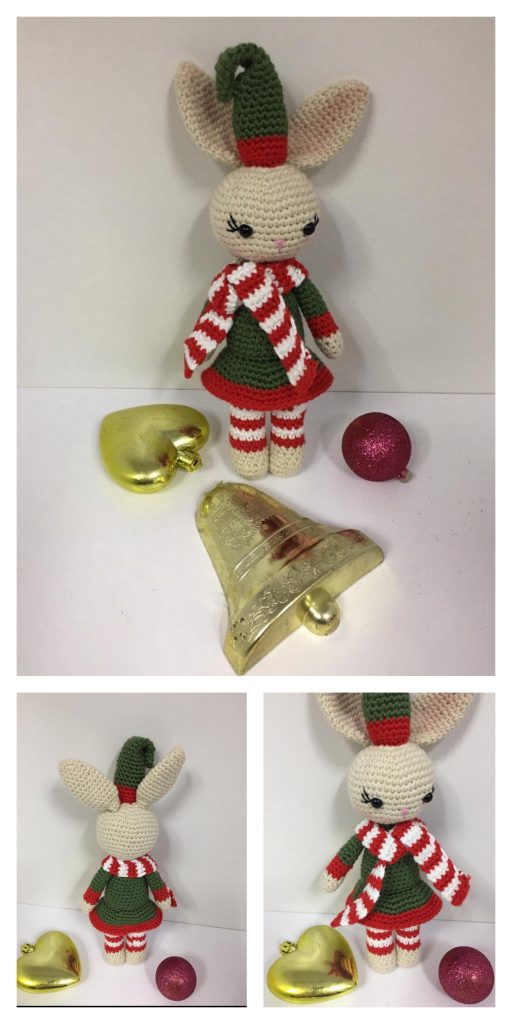
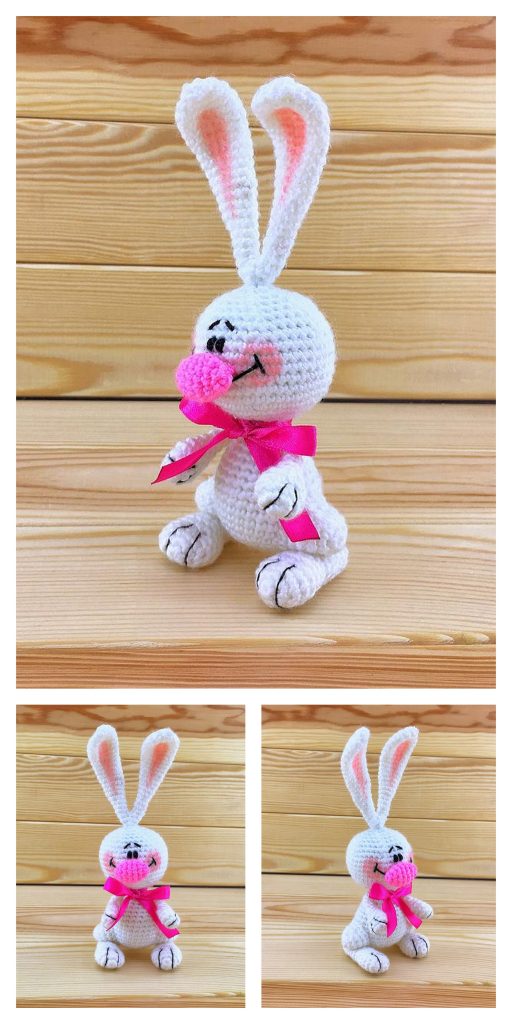
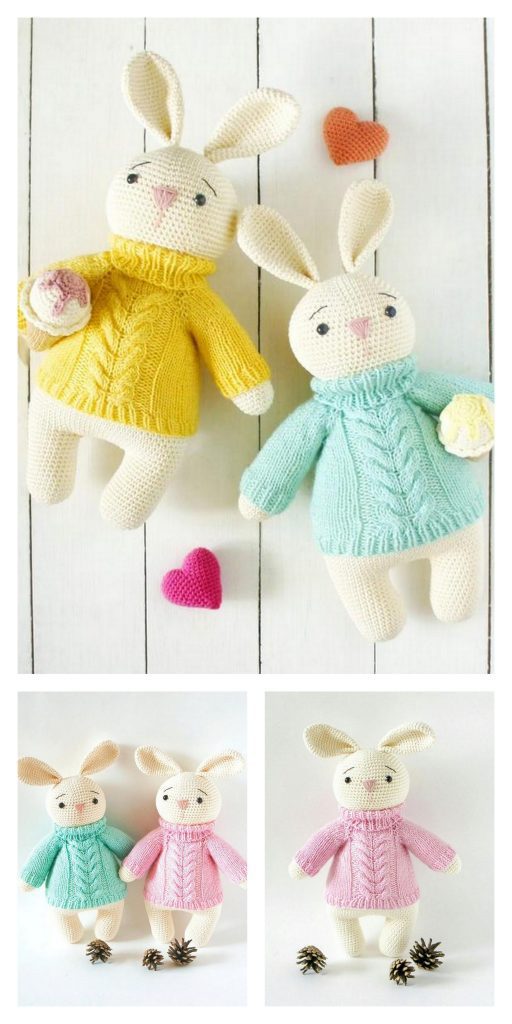
Todays daily new amigurumi free crochet pattern is Amigurumi Winter Bunny.
I want to give you some informations about this amigurumi free pattern ; Winter Bunny.
Abbreviations
| MC | main colour |
| CC | contrast colour |
| sc | single crochet |
| dc | double crochet |
| BLO | back loop only |
| sc2tog | single crochet 2 stitches together |
| ss | slip stitch |
Materials
- MC – Body and Head (Pink) – 70gr (115m/126yrds) Dk/ 8 ply yarn
- CC1 – Ear Trim, Hat & Tail (Purple) – 20 gr (33m, 36yrds) Dk/ 8 ply yarn
- CC2 – Scarf (Fushcia) – 10 gr (16.5m/18yrds) Dk/ 8 ply yarn
- Safety eyes – (or extra thread to embroider eyes)
- 4mm Hook
- Darning needle
- Stuffing
- Small amount of pink felt for nose
- Small amount of black thread for mouth and whisker detail
Amigurumi Winter Bunny Free Pattern
Arms (Make 2)
Rnd 1 Using MC – work 6 sc in Magic Circle
Rnd 2 2sc in each st around (12)
Rnd 3 (sc, 2sc in next st) around (18)
Rnd 4 sc in each st around in BLO (18)
Rnd 5-6 sc in each st around (18)
Rnd 7 (sc, sc2tog) around (12)
Rnd 8 -18 sc in each st around (12)
Add stuffing to the bottom half of the arm. Fold the top of the arm in half, line up stitches as evenly as possible – sc 6 across – working each stitch through the 2 parallel single chains from the previous round to close up the hole. Place arms aside for attachment later.
Legs (Make 2)
Rnd 1 Using MC – Work 6 sc in Magic Circle
Rnd 2 2sc in each st around (12)
Rnd 3 (sc, 2sc in next stitch) around (18)
Rnd 4 (sc in 2 sts, 2sc in next st) around (24)
Rnd 5 sc in each st around in BLO (24)
Rnd 6-8 sc in each st around (24)
Rnd 9 (sc in 2 sts, 2sctog) around (18)
Rnd 10-14 sc in each st around (18)
Fasten off one leg only.
Do not fasten off the second leg. Continue.
The next rounds will join the legs whilst creating the rabbit’s body.
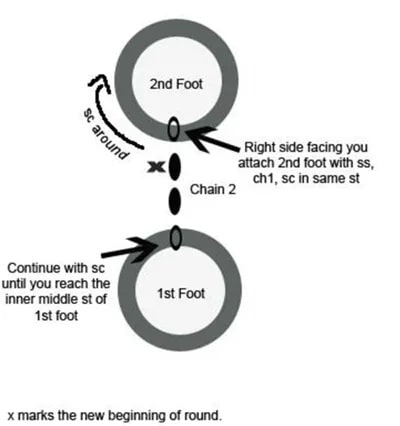
Rnd 15 Refer to Diagram 1 below.
Work a few sc until you reach the approximate middle stitch of the first foot. Ch2, ss into the side middle stitch of the 2nd foot. You are now ready to continue the round working around the back of the 2nd foot first. Ch 1 (doesn’t count as stitch), sc in same st, sc in next st and in each st around 2nd foot, sc across one side of 2ch by working in one loop only, sc in each st around 1st foot, sc across the other side of 2ch in unworked loops (40) Mark the last sc worked as the new beginning of round.
Rnd 16 sc in each st around (40)
Rnd 17 sc in 8 sts, (2sc in next st) 4 times, sc in next 16 sts, ( 2sc in next st) 4 times, sc in last 8 sts (48)
Rnd 18 sc in 8 sts, (sc in next st, 2sc in next st) 4 times, sc in next 16 sts, (sc in next st, 2sc in next st) 4 times, sc in last 8 sts (56)
Rnd 19 sc in 8 sts, (sc in next 2 sts, 2sc in next st) 4 times, sc in next 16 sts, (sc in next 2 sts, 2sc in next st) 4 times, sc in last 8 sts (64)
Rnd 20-24 sc in each st around (64) Rnd 25 sc in 8 sts, (sc in next 2 sts, sc2tog) 4 times, sc in next 16 sts, (sc in next 2 sts, sc2tog) 4 times, sc in last 8 sts (56)
Rnd 26 sc in each st around (56)
Rnd 27 sc in 8 sts, (sc in next st, sc2tog) 4 times, sc in next 16 sts, (sc in next st, sc2tog) 4 times, sc in last 8 sts (48)
Rnd 28-29 sc in each st around (48)
Rnd 30 (sc in 10 sts, sc2tog) around (44)
Bottom is now complete. Continue to create the rest of the body.
Torso
Rnd 31 sc in each st around (44)
Rnd 32 (sc in 9 sts, sc2tog) around (40)
Rnd 33 sc in each st around (40)
Rnd 34 (sc in 8 sts, sc2tog) around (36)
Rnd 35 sc in each st around (36)
Rnd 36 (sc in 7 sts, sc2tog) around (32)
Rnd 37-38 sc in each st around (32)
Attach arms in next round. You will attach the arms by working each st through both the arm sc and the torso sc to join, as indicated in instructions.
Rnd 39 sc in 9 sts, sc in next 6 sts working through both the 1st arm and the torso, sc in next 10 sts, sc in next 6 sts working through both the 2nd arm and the torso, sc in last st (32)
Rnd 40 (sc in 6 sts, sc2tog) around (28)
Rnd 42 (sc in 5 sts, sc2tog) around (24)
Rnd 43 (sc in 4 sts, sc2tog) around (20)
The body is now complete. Continue working to complete the head
Head
Rnd 44 (sc in 4 sts, 2sc in next st) around (24)
Rnd 45 (sc in 2 sts, 2sc in next st) around (32)
Rnd 46 (sc in 3 sts, 2sc in next st) around (40)
Rnd 47 (sc in 4 sts, 2sc in next st) around (48)
Rnd 48 (sc in 5 sts, 2sc in next st) around (56)
Rnd 49 sc in each st around (56)
Rnd 50 (sc in 6 sts, 2sc in next st) around (64)
Rnd 51-60 sc in each st around (64)
If using safety eyes, attach eyes between row 56 and 57, at your desired distance apart.
Add Stuffing.
Rnd 61 (sc in 6 sts, sc2tog) around (56)
Rnd 62 (sc in 5 sts, sc2tog) around (48)
Rnd 63 (sc in 4 sts, sc2tog) around (40)
Rnd 64 (sc in 3 sts, sc2tog) around (32)
Rnd 65 (sc in 2 sts, sc2tog) around (24)
Rnd 66 (sc, sc2tog) around (16)
Rnd 67 (sc in 2 sts, sc2tog) (12)
Rnd 68 sc2tog around (6)
Add your final stuffing. Pull the yarn through last st, and close up hole. Weave in your final thread
Ears (Make 2)
Work in rows. Ch1 at beginning of row does not count as stitch.
Row 1 Ch4, sc in 2nd ch from hook and next 2 ch, turn (3)
Row 2-3 Ch1, sc across, turn (3)
Row 4 Ch1, 2sc in 1st st, sc in next st, 2sc in last st, turn (5)
Row 5-9 Ch1, sc across, turn (5)
Row 10 Ch1, 2sc in 1st st, sc in each st across till last st, 2sc in last st (7)
Row 11-15 Ch1, sc across, turn (7)
Row 16 Repeat Row 10 (9)
Row 17-24 Ch1, sc across, turn (9)
Row 25 Ch1, sc2tog, sc across till last 2sts, sc2tog (7)
Row 26 – 27 Repeat Row 25 till you are left with three sc across.
Fasten off – Leave enough yarn to attach ears to the rabbit’s head.
Using CC1 work a border around ears in either crab stitch or single chain. Steam press ears to flatten.
Using long tail threads, sew the ears to head.
Hat
Work in rounds. Replace the first dc of each round with a beginning chainless dc (preferred method), or a ch3.
Join each round with ss to top of beginning dc/ch3.
Rnd 1 Using CC1 – Work 10 dc in Magic Circle
Rnd 2 2dc in each st around (20)
Rnd 3 (dc, 2dc in next st) around (30)
Rnd 4 (dc in 2 sts, 2dc in next st) (40)
Rnd 5-7 dc in each st around (40)
Fasten off and weave in ends.
Scarf
Work in rows.
Ch1 at beginning of row does not count as stitch.
Row 1 Ch3, sc in 2nd ch from hook and next ch, turn
Row 2-48 Ch1, sc in 1st, sc in next st, turn (2)
Fasten off and weave in ends
Finishing
Cut out the rabbit’s nose from pink felt, and sew or hot glue to attach to the rabbit’s face. Use black thread to embroider the mouth and whisker details, as desired. To create freckles, I used the french knot method.
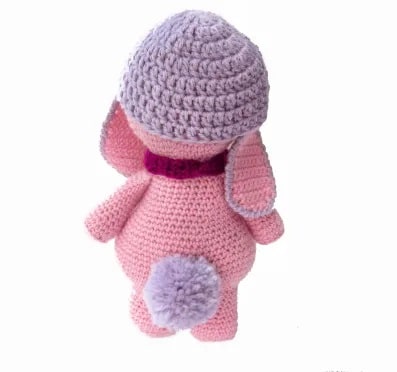
Make a pom-pom for the tail and attach to the rabbit’s bottom. You can use a pom-pom maker or simply follow this fantastic tutorial. It shows you how to make pom-poms with either a fork or two rolls of toilet paper. I find the fork tutorial creates the ideal size pom-pom for the Amigurumi rabbit.
More Amigurumi Bunny Ideas:
