Hello dear Amigurumi Followers
Today we share Amigurumi Small White Mouse Free Pattern for you. As you know we share new free amigurumi pattern every day. The main crochets are gazelle, amigurumi bear, pola, crochet panda, penguin, giraffe, llama, pig, bunny, clown, lamb, bee, crochet unicorn, amigurumi doll, fox, penguin, dinosaur, crochet elephant, hippo, monkey, crochet cat, crochet dog and more …
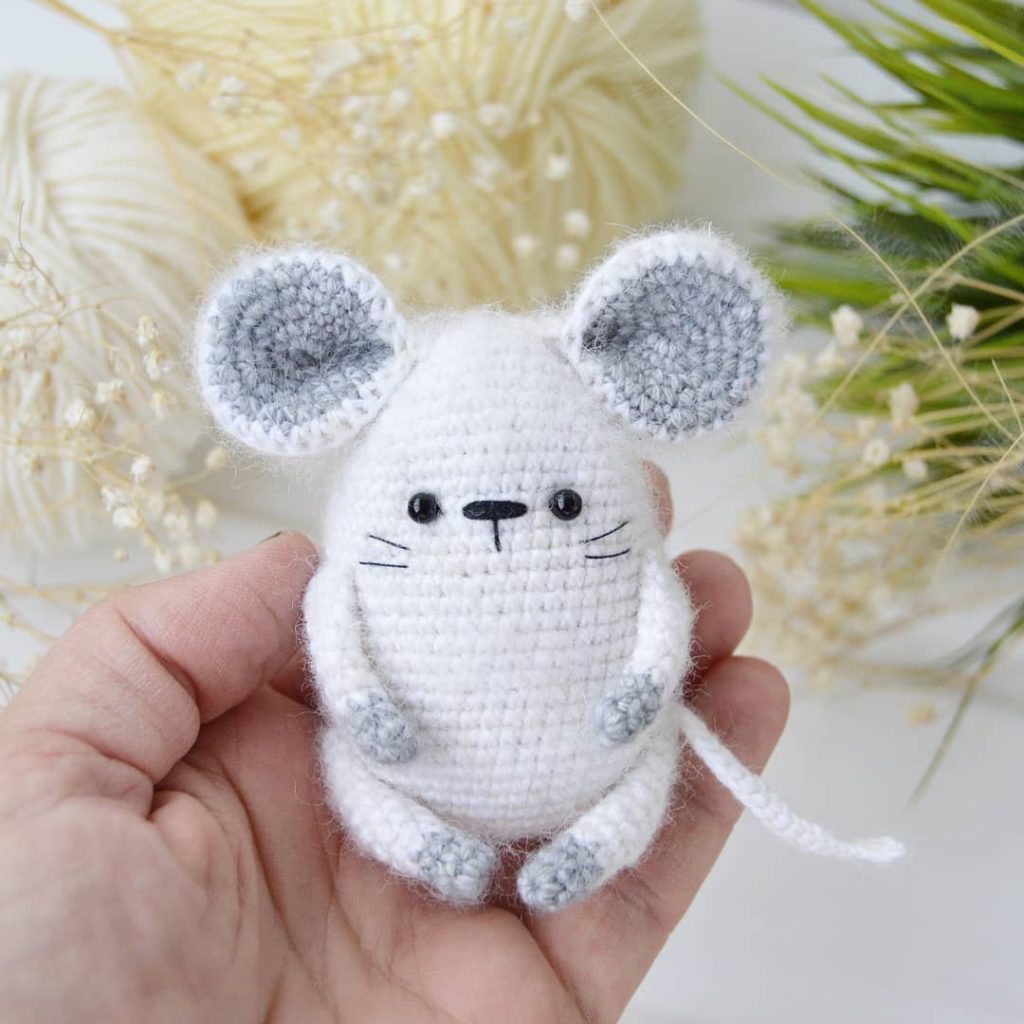
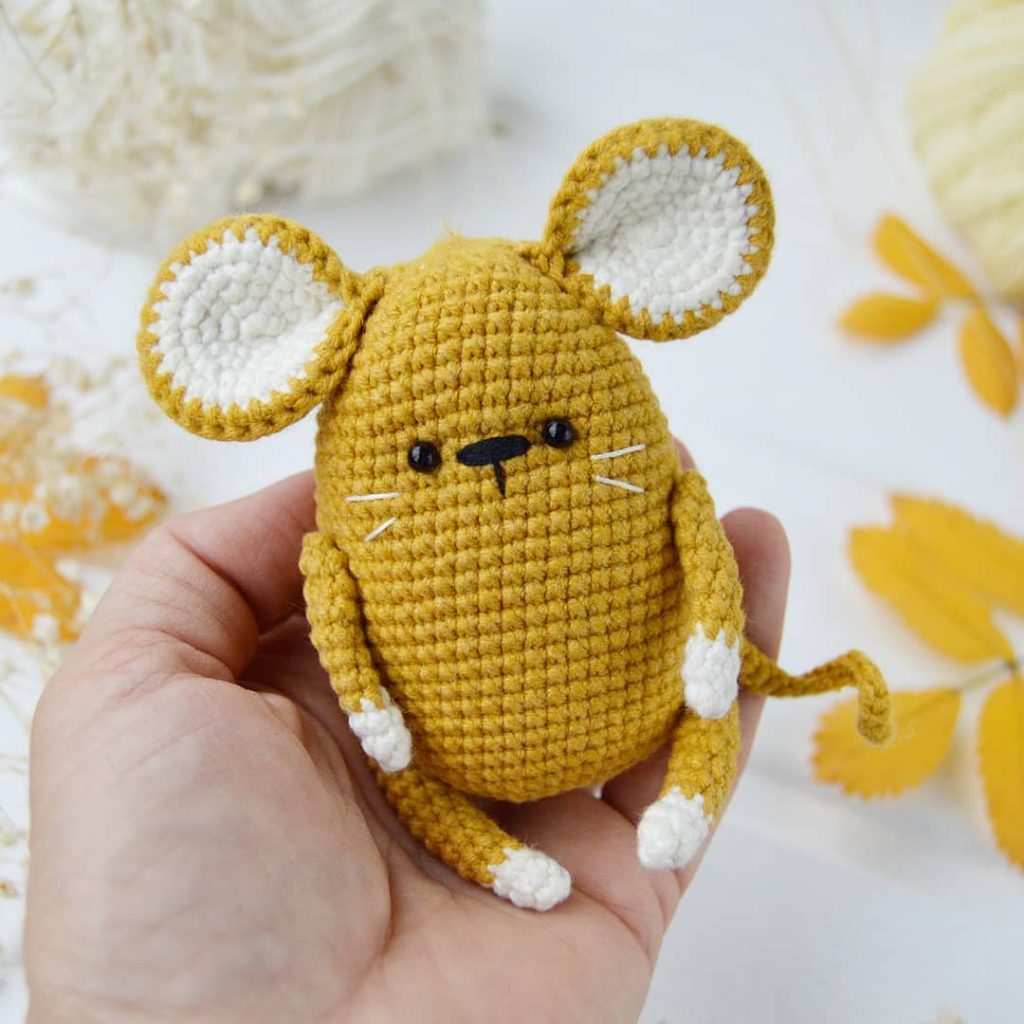
Todays daily new amigurumi free crochet pattern is Amigurumi Small White Mouse.
I want to give you some informations about this amigurumi free pattern ; Small White Mouse.
To make a mouse, you can use both smooth and fluffy yarn. The size of a knitted mouse from fluffy yarn Drops Nord is about 8 cm, from YarnArt Jeans – about 9 cm.

Materials:
1. Yarn of two colors (1 main color, 2 additional color): Drops Nord (150 g / 170 m) or YarnArt Jeans (50 g / 160 m)
2. Yarn hook
3. Needle with a wide eye, sewing needle
4. Threads for the nose and mustache (for example, Vita Pelican or Iris)
5. Two black beads or ready-made eyes 4-5 mm in size, threads for sewing on
6. Filler, tweezers or stuffing stick
7. Velcro tape for combing fluffy yarn
Legend:
KA – amigurumi ring
vp – air loop
ss – connecting column
sbn – single crochet
pr – increase (2 columns we knit in one loop)
dec – decrease (2 columns we knit together)
(sbn, inc} xn- repeat indicated in brackets n number of times
(n) – the number of loops in the row
Amigurumi Small White Mouse Free Pattern

Ears (two parts)
Yarn Color 2.
1 row: 6 sc in KA
2 row: 6 inc (12)
3 row: (1 sc, 1 inc) x6 (18)
4 row: (1 sc, 1 inc, 1 sbn) x6 (24)
5 row: (3 sbn, 1 inc) x6 (30) Fasten the
thread, cut.
Yarn Color 1.
1 row: 6 sc in KA
2 row: 6 inc (12)
W row: (1 sc, 1 inc) x6 (18)
4 row: (1 sc, 1 inc, 1 sc) x6 (24)
5 row: (3 sc, 1 inc) x6 (30)
Do not cut the thread.
Fold two parts from the main and additional yarn with the wrong side inward. Continue knitting in the round with the main thread,
capturing the loops of both parts at the same time.
6 row: 30 sc
Fold the part in half with the complementary color inside.
Knit 3 sbn, connecting both sides.
Fasten the thread, cut, leaving the tip for sewing.
Handles (tie two parts)
Yarn color 2.
1 row: 6 sc in KA
2-3 rows: 6 sc
Change yarn to color 1.
4-5 rows: 6 sc
6 row: 5 sc, 1 inc (7)
7 row : 7 sc
8 row: 6 sc, 1 inc (8)
9 row: 8 sc
Option 1
If you want to sew the handles in a fixed position:
Row 10: Fold the part in half, knit 4 sc, connecting both halves.
Fasten the thread, cut, leaving the end for sewing.
Option 2
If you want the handles to move, you need to use a thread or button mount. In this case:
10 row: 4 ub
Tighten the hole, fasten the thread, cut.
Hide the tip inside.
Do not stuff your hands.
Tail
Cast on 41 chain sts. Starting from the second loop from the hook, work 40 cc.

Legs (tie two parts)
Yarn color 2.
1 row: 6 sc in KA
2-3 rows: 6 sc
Change yarn to color 1.
4 row: 5 sc, 1 inc (7)
5 row: 7 sc
6 row: b sc, 1 inc (8)
7 row: 8 sc
8 row: 7 sc, 1 inc (9)
9 row: 9 sc
10 row: 8 sc, 1 inc (10)
11-12 rows: 10 sc
Stuff the legs to about half.
Option 1
If you want to sew the legs in a fixed
position:
Row 13: Fold the part in half, knit 5 sc, connecting both halves.
Fasten the thread, cut, leaving the tip for sewing.
Option 2
If you want the legs to move, you need to use a thread or button mount. In this case:
13th row: 5 UB
Tighten the hole, fasten the thread, cut, hide the tip inside.
Body
1 row: cast on 9 ch.
2 row: starting from the second loop from the hook: 1 inc, 6 sc, 3 sc in the last loop, turn,
then on the second side of the chain: 7 sc (18). Next, knit in a spiral.
3 row: 18 sc
4 row: 2 inc, 6 sc, 3 inc, 6 sc, 1 inc (24)
5 row: (1 sc, 1 inc) x2, 6 sc, (1 sc, 1 inc) x3, 7 Sc, 1 inc (30)
6 row: 30 sc
7 row: (2 sc, 1 inc) x2, 6 sc, (2 sc, 1 inc) x3, 8 sc, 1 inc (36)
8 row: 36 sc
9 row: (3 sb, 1 inc) x2, 6 sb, (3 sb, 1 inc) x3, 9 sb, 1 inc (42)
10 row. 42 sc
11 row: 4 sc, 1 inc, 20 sc, 1 inc, 16 sc (44)
12 row: 44 sc
13 row: 5 sc, 1 inc, 21 sc, 1 inc, 16 sc (46)
14 row: 46 sc
15 row: 6 sc, 1 inc, 22 sc, 1 inc, 16 sc (48)
16 row 48 sc (48)
17 row: 7 sc, 1 inc, 23 sc, 1 inc, 16 sc (50)
18-22 rows: 50 sc
23rd row: 7 sc, 1 dec, 23 sc, 1 dec, 16 sc (48)
24-25 rows: 48 sc
26 row: 7 sc, 1 dec, 22 sc, 1 dec, 15 sc (46 )
27 row: 46 sc
28 row: 2 sc, (1 dec, 3 sc) x3, 8 sc, (1 dec, 3 sc) x3, 6 sc (40)
29-30 rows: 40 sc
31 row: (3 PRS, 1 dec) x8 (32)
32 row: (2 PRS, 1 dec) x8 (24)
33 row: (1 PRS, 1 dec 8 (16)
Stuff the body tightly.
34 row: 9 dec (7)
Add filler, if necessary,
tighten the hole with a needle, fasten the thread, hide it inside.
details. When you hide the thread, it is advisable to use it to pull the bottom inside the carcass so that the surface on which the mouse will sit is flat.
Assembly and decoration
Sew the ears on the sides of the crown. Handles sew between 16 and 18 rows, not exactly on the sides, but closer to the belly. Sew the legs on the sides at the same level with the ears approximately between 27-28 rows. Sew a ponytail on the back in the center
Embroider a spout between 12 and 13 rows (length about 3-4 loops). Sew on the eyes at the same level, through 1-2 loops on the sides of the spout.
Decorate the muzzle as desired. You can embroider mustaches.
If you knitted from fluffy yarn, comb the mouse with Velcro tape.
Your Mouse-Mouse is ready!
